Imagine the convenience of arriving home and, with just a press of a button in your car, your gate smoothly opens, welcoming you in. No more fumbling for a separate remote or interrupting your drive. Programming your gate opener to your car is not just a luxury; it’s a step towards streamlined convenience and enhanced security. This guide will walk you through the process of integrating your gate opener remote with your car, ensuring a seamless entry every time you arrive at your property.
Understanding Gate Remote Programming Basics
Before diving into the programming steps, it’s helpful to understand the fundamentals of how gate remote programming works. At its core, programming a gate remote involves establishing communication between your remote control and the gate’s receiver unit. This receiver, usually a small device located near your gate motor, is designed to receive radio signals from your remote. When you press a button on your programmed remote, it sends a specific signal to the receiver, which in turn activates the gate motor to open or close.
Think of it as setting up a secret code. You’re essentially teaching your gate receiver to recognize the unique signal from your car’s built-in remote system or a handheld remote programmed to your car. This ensures that only authorized devices can operate your gate, adding a layer of security and personalized access control to your property. Properly programmed remotes offer reliable and efficient gate operation, making your daily comings and goings smoother and more secure.
Why Program Your Gate Opener to Your Car?
Integrating your gate opener with your car offers a multitude of benefits that extend beyond mere convenience. Firstly, it consolidates your controls. Instead of managing multiple remotes for your gate and car, you can operate your gate directly from your car’s dashboard. This is particularly useful in inclement weather, allowing you to open your gate without having to step out of your vehicle.
Secondly, it enhances security. By programming your gate to respond to your car’s remote system, you reduce the risk of losing or misplacing a separate gate remote. Furthermore, many modern cars come with rolling code technology in their built-in remote systems, which offers a higher level of security compared to traditional fixed-code remotes. Rolling code technology changes the access code each time the remote is used, making it significantly harder for unauthorized individuals to intercept and replicate the signal.
Finally, it adds to the overall convenience of your daily routine. Imagine no longer having to clip an extra remote to your visor or search for it in your glove compartment. With your gate opener programmed to your car, operation becomes intuitive and effortless, contributing to a more streamlined and secure lifestyle.
Tools You’ll Need Before You Start
Before you begin programming your gate opener to your car, gathering the necessary tools and information will ensure a smoother process. Typically, you won’t need many specialized tools. Here’s a basic list:
- Your Car’s User Manual: This is crucial. Your car’s manual will provide specific instructions on how to program its built-in HomeLink or similar system, which is what you’ll use to communicate with your gate opener.
- Your Gate Opener Remote and/or User Manual: Have your existing gate remote handy, especially if you are programming a rolling code remote. The gate opener’s manual might also be useful for identifying the ‘Learn’ or ‘Program’ button on the receiver unit.
- A Screwdriver (Possibly): In some cases, you might need a screwdriver to access the receiver unit on your gate opener to press the ‘Learn’ button.
- New Batteries (If Necessary): If your existing gate remote is old or has a weak signal, consider replacing the batteries to ensure a strong signal during the programming process.
Having these items prepared will save you time and frustration, allowing for a more efficient and successful programming experience. Always prioritize consulting your car’s and gate opener’s manuals, as specific steps can vary depending on the models and manufacturers.
Step-by-Step Guide to Programming Your Gate Opener to Your Car
Programming your gate opener to your car involves a few key steps, and the exact process can differ slightly based on whether you have a fixed-code (dip switch) remote or a rolling code remote. Here’s a comprehensive guide to cover both scenarios:
1. Identifying Your Gate Remote and System Type
The first crucial step is to determine the type of gate remote system you have. There are primarily two types:
- Fixed-Code (Dip Switch) Remotes: These remotes use a series of tiny switches (dip switches) inside the remote and receiver. The code is set by the position of these switches. If your remote has dip switches, it’s a fixed-code system.
- Rolling Code Remotes: These systems use a constantly changing code for enhanced security. They typically involve pressing a ‘Learn’ or ‘Program’ button on the receiver unit to synchronize with the remote. Most modern gate openers and car systems utilize rolling code technology.
If you are unsure, check your gate opener’s manual or the model number on your remote online to identify the type. This distinction is critical as the programming procedure differs significantly between these two types.
2. Programming a Dip Switch Remote to Your Car
Programming a dip switch remote to your car is generally a simpler process because you are essentially cloning the signal. Here’s how:
- Ensure Your Existing Remote is Working: Verify that your current dip switch gate remote is functioning correctly and can open and close your gate.
- Locate Your Car’s Programming Buttons: Consult your car’s user manual to find the location of the HomeLink or compatible programming buttons. These are usually located on the rearview mirror, visor, or overhead console.
- Clear Existing Car Codes (Recommended): To start fresh, it’s often recommended to clear any previously programmed codes in your car’s system. This is usually done by pressing and holding the two outer HomeLink buttons simultaneously for about 20-30 seconds until the indicator light blinks rapidly. Refer to your car’s manual for the exact procedure.
- Simultaneous Programming:
- Hold your existing, working gate remote close to your car’s programming button that you wish to program. Typically, you should hold the remote within 1-3 inches of the car’s button.
- Press and hold the button on your existing gate remote that you normally use to open the gate.
- While still holding the gate remote button, press and hold the desired programming button in your car.
- Keep both buttons pressed until the indicator light in your car blinks slowly and then rapidly, or becomes solid. This indicates that the car has learned the signal from your dip switch remote. This might take anywhere from a few seconds to a minute.
- Test: Press the programmed button in your car to see if it opens your gate. If it works, you’re done! If not, repeat the steps or consult troubleshooting tips.
3. Programming a Rolling Code Remote to Your Car (Two-Step Process)
Programming a rolling code remote to your car involves a two-step process due to the enhanced security features. You’ll need to interact with both your existing remote and the gate receiver unit.
Step 1: Car to Remote Learning
- Ensure Your Existing Remote is Working: Make sure your current gate remote is working and has battery.
- Locate Your Car’s Programming Buttons: Find the HomeLink or compatible buttons in your car as described earlier and consult your car’s manual.
- Clear Existing Car Codes (Recommended): Clear any old codes from your car’s system as mentioned in the dip switch programming steps.
- Initial Programming Attempt:
- Hold your working rolling code gate remote close to your car’s programming button.
- Press and hold the button on your gate remote.
- Simultaneously, press and hold the chosen programming button in your car.
- Wait for the indicator light in your car to blink slowly and then rapidly. This usually indicates the car has recognized a signal. However, with rolling codes, this is just the first step.
- Test (Initial Test – May Not Work Yet): Press the programmed button in your car. At this stage, it might not open the gate because the car now needs to learn the rolling code directly from the gate receiver.
Step 2: Gate Receiver Learning
- Locate the ‘Learn’ or ‘Program’ Button on Your Gate Receiver: Find the receiver unit of your gate opener. This is usually a box near the gate motor. Look for a button labeled ‘Learn,’ ‘Program,’ or something similar. You might need to remove a cover on the receiver unit to access this button.
- Press the ‘Learn’ Button: Briefly press and release the ‘Learn’ button on the gate receiver unit. Usually, an LED indicator light will turn on or blink to show it’s in learning mode. Important: You typically have a limited time (usually 30 seconds) after pressing the ‘Learn’ button to complete the next step.
- Return to Your Car and Activate: Immediately return to your car and press and hold the programming button in your car that you programmed in Step 1 for about 2-3 seconds, and then release. You might need to repeat this press-and-hold-release cycle up to three times, as indicated in your car’s manual or gate opener manual. Watch for the gate to respond or the indicator light on the receiver to change, indicating successful programming.
- Final Test: Press the programmed button in your car again. Your gate should now open and close. If it works, the programming is complete.
Image alt text: Multicode 3089 dip switch remote control, commonly used for gate openers, showcasing the internal dip switches.
Image alt text: Linear DT1 single-button remote, a simple and compact option for operating gate openers and garage doors.
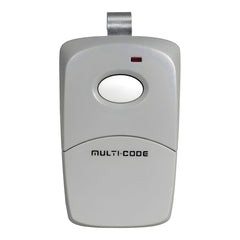
Image alt text: LiftMaster 892LT rolling code remote, featuring Security+2.0 technology for secure gate and garage access.
Image alt text: EG642 handheld rolling code remote, demonstrating its user-friendly design and typical usage for gate control.
Troubleshooting Common Programming Issues
Even with careful steps, you might encounter issues. Here are some common problems and how to address them:
- Remote Not Syncing: If your car doesn’t seem to be learning the remote signal, ensure you are holding the remotes close enough and that your existing gate remote has fresh batteries. Double-check if you’ve cleared old codes from your car’s system.
- Gate Not Responding After Programming: For rolling code systems, remember the crucial second step of pressing the ‘Learn’ button on the gate receiver. If you skipped this, the car remote won’t work. Also, ensure you are within range of the gate when testing.
- LED Light Not Blinking as Expected: If the indicator lights on your car or gate receiver aren’t behaving as described in the manuals, re-read the instructions carefully. Sometimes, the timing of button presses is critical.
- Compatibility Issues: In rare cases, your car’s HomeLink system might not be compatible with your gate opener’s frequency or coding system. Check compatibility information in your manuals or consult the manufacturers’ websites.
- Factory Reset: If all else fails, you can try factory resetting both your car’s HomeLink system (refer to car manual) and your gate receiver (refer to gate opener manual) and then attempt the programming process again from the beginning.
If troubleshooting doesn’t resolve the issue, consider contacting a professional gate installer or your car dealership’s service department for assistance.
Compatibility Check: Car and Gate Remote Systems
Before you begin the programming process, it’s wise to consider compatibility. Most modern cars with built-in remote systems like HomeLink are designed to be universally compatible with a wide range of gate and garage door openers. However, there can be exceptions.
- Check Your Car’s Manual: Your car’s user manual is the best resource to confirm compatibility and to understand the specific programming steps for your vehicle. Look for sections on HomeLink or garage door/gate opener programming.
- Gate Opener Frequency: Gate openers operate on specific radio frequencies. While most operate on common frequencies, ensure that your car’s system is compatible with the frequency of your gate opener. This information is usually in your gate opener’s manual or on the manufacturer’s website.
- Rolling Code vs. Fixed Code Compatibility: While most car systems can handle both rolling code and fixed code, rolling code systems offer superior security and are generally recommended. Ensure your car system is capable of learning the type of code your gate opener uses.
- Consult Professionals: If you are unsure about compatibility or encounter persistent issues, don’t hesitate to consult with a professional gate installer or your car dealership. They can provide expert advice and ensure seamless integration.
Maintaining Your Car-Programmed Gate Opener
Once you have successfully programmed your gate opener to your car, maintaining it is straightforward, primarily focusing on the power source and occasional checks.
- Regular Battery Checks (for Handheld Remotes Used in Programming): If you used a handheld remote to program your car (especially for rolling codes), ensure the remote’s batteries are in good condition. Weak batteries can lead to signal issues over time. Replace batteries as needed.
- Car Battery Maintenance: The car’s built-in remote system relies on the car’s battery. Ensure your car battery is well-maintained and replaced when necessary to keep all car features, including the gate opener, functioning correctly.
- Periodic Testing: Occasionally test the programmed gate button in your car to ensure it’s still working reliably. This is especially useful after car battery replacements or any electrical work on your vehicle.
- Reprogramming if Necessary: If you change cars or gate openers, or if for any reason the programming is lost (which is rare but can happen), you’ll need to repeat the programming process. Keep your manuals handy for easy reference.
Conclusion
Programming your gate opener to your car is a worthwhile endeavor that significantly enhances convenience and security. By following this step-by-step guide, understanding the type of remote system you have, and taking the necessary compatibility checks, you can seamlessly integrate your gate operation into your vehicle. Enjoy the ease of one-touch gate access every time you arrive home, simplifying your routine and adding a touch of modern convenience to your daily life. With a bit of patience and attention to detail, mastering this process is well within reach for any homeowner.
For a wide selection of gate remotes and accessories, visit: https://elitegates.net/collections/remote-controls