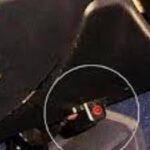
Programming your Prostart remote car starter can seem daunting, but with the right steps, it’s a straightforward process. This guide will walk you through how to program your Prostart remote, focusing on using the hood pin switch, a common feature in these systems. Many installers utilize the hood pin switch for programming, although some may skip installing it due to potential corrosion issues. If you’re looking to program your remote, understanding how to use this switch is key.
Locating the Hood Pin Switch Wire
The hood pin switch wire is typically a GRAY wire that comes directly from your Prostart unit. It’s usually found within the harness next to the larger ignition harness. To access it, you’ll likely need to look under your dashboard to locate the Prostart unit. Some installations might have the hood pin switch still attached to this wire. If not, you may need to use a wire extender or a test light probe to ground the wire effectively for programming.
Entering Programming Mode
To initiate the programming sequence, you’ll need to use the hood pin wire to enter programming mode. This involves a specific grounding technique:
- Ground the GRAY hood pin wire for a brief moment and then release. You should observe the lights flashing, indicating the system is registering the action.
- Immediately ground the GRAY hood pin wire again and hold it grounded. The lights will flash again and then remain on, signaling that you have successfully entered programming mode.
You must program your remotes within 30 seconds of entering programming mode, otherwise, the system will exit programming mode automatically.
Programming Your Remotes
Once you are in programming mode (lights are on), follow these steps to program your Prostart remote:
- Insert your key into the ignition.
- Turn the key from the ACC (accessory) position to the IGN (ignition) position and then immediately remove the key. This action tells the system you are ready to program a remote.
- Press and hold the LOCK button on your remote. You will hear an initial click sound. Continue holding the LOCK button until you hear an additional five clicks. This confirms that the remote has been successfully programmed.
Repeat this same process for any additional remotes you need to program.
Troubleshooting Tips
If you follow the hood pin grounding procedure and the system does not enter programming mode (no light flashes or response), there are a couple of things to check:
- Check your fuses: Ensure that all fuses related to your car starter system are in good condition and not blown. A blown fuse can prevent the system from functioning correctly.
- Unit Malfunction: If fuses are not the issue, and the system is still unresponsive, it’s possible that your Prostart unit may be faulty or no longer functional. In this case, professional diagnosis or replacement of the unit might be necessary.
By following these steps, you should be able to program your Prostart remote car starter successfully and regain control over your remote start system.

