Imagine the convenience of opening your gate without fumbling for a separate remote as you approach your property. Programming your gate remote to your car allows for seamless access, merging security and ease of use into your daily routine. This guide provides a comprehensive walkthrough on how to program your gate remote to your car, enhancing your home access experience.
Understanding Gate Remote Programming Basics
Before diving into the programming process, it’s crucial to understand the fundamentals of how gate remotes work. Gate remote programming is essentially the process of teaching your remote to communicate with your gate’s receiver. This receiver unit, installed on your gate system, is the intermediary that interprets signals from your remote and activates the gate motor to open or close. The handheld remote transmits a specific code to this receiver.
Why is understanding these basics important? Because different types of remotes and receivers require different programming methods. Knowing whether you have a fixed-code or rolling code system, for instance, is the first step in successful programming. Programming ensures a secure and reliable connection, giving you control over your property’s access.
Why Program Your Gate Remote to Your Car?
Programming your gate remote to your car offers significant advantages:
- Enhanced Convenience: No more searching for a separate remote. Operate your gate directly from your car’s built-in system.
- Increased Security: Integrated systems reduce the risk of lost or stolen remotes, as the car itself becomes the “remote.”
- Streamlined Access: Simplify your entry and exit process, especially useful in inclement weather.
- Clutter Reduction: Eliminate extra remotes on your keychain or in your car’s console.
Programming your gate remote to your car enhances your lifestyle by adding a layer of convenience and security to your daily comings and goings.
Essential Tools for Gate Remote Programming
To program your gate remote effectively, gather these common tools:
- Screwdriver: May be needed to access the receiver unit or battery compartment on your remote.
- Ladder (Potentially): If your receiver unit is located at a height, a ladder can provide safe access.
- New Batteries (If Applicable): Ensure your remote has fresh batteries, especially if it’s been in use for a while.
- User Manuals: Crucially, have both your gate remote’s manual and your car’s owner’s manual at hand. These provide specific instructions for your models.
Some advanced gate remote systems might require specialized programming tools, but for most standard setups, the above tools will suffice. Always consult your manuals to identify if any unique tools are necessary for your specific equipment. Preparation is key to a smooth and successful programming process.
Step-by-Step Guide to Program Your Gate Remote
Let’s walk through the process of programming your gate remote. The steps can vary based on the type of remote you have (fixed-code or rolling code) and whether you’re programming it directly or to your car.
Step 1: Identify Your Gate Remote Model
The first crucial step is to correctly identify your gate remote model. This information dictates the programming method you’ll need to use.
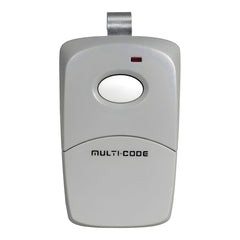
Alt text: Multicode 3089 dip switch gate remote, commonly used for fixed-code systems.
Alt text: Linear DT1 dip switch gate remote, another example of a fixed-code transmitter.
Refer to your gate remote’s user manual, the manufacturer’s website, or look for a model number directly on the remote itself. If you’re unsure, contacting the manufacturer or supplier with a picture of your remote can help in identification. Correctly identifying your model ensures you follow the right programming procedure.
Step 2: Programming Fixed-Code Gate Remotes (Dip Switch)
Fixed-code remotes, often utilizing dip switches, are programmed by matching switch positions on both the remote and the receiver. Common brands include Multicode and Linear. Here’s how:
- Locate the Receiver Unit: Find the receiver box, usually near the gate opener, often with an antenna.
- Access Dip Switches on Receiver: Open the receiver unit to find the dip switches.
- Access Dip Switches on Remote: Open the remote (often near the battery) to find its dip switches.
- Match Dip Switch Positions: Set the dip switches on the remote to match the exact pattern of the dip switches on the receiver.
- Set New Code (Optional): To change the code entirely, alter the dip switch patterns on both the receiver and the remote to a new, matching configuration.
Alt text: LiftMaster 892LT rolling code gate remote, a typical example of a modern, secure remote.
Step 3: Programming Rolling Code Gate Remotes
Rolling code remotes offer enhanced security by changing the code each time they are used. Programming typically involves a “Learn” or “Program” button on the receiver.
- Locate Receiver Unit: As with fixed-code remotes, find the receiver near the gate operator.
- Find “Program” Button: Look for a button labeled “Program” or “Learn” on the receiver unit.
- Press “Program” Button: Press and release the “Program” button. An LED indicator light usually turns on.
- Press Remote Button: Press the button on your remote that you wish to program. The indicator light on the receiver should blink or turn off to confirm programming.
Alt text: EG642 rolling code gate remote being held, demonstrating a common type of modern remote control.
Step 4: Integrating Your Gate Remote with Your Car
To program your gate remote to your car’s built-in system, you’ll generally use your car’s Homelink or similar system. Consult your vehicle’s owner’s manual for specific instructions to enter programming mode. This often involves pressing and holding one or two buttons in your car until an indicator light flashes. You may need to clear existing codes before programming a new one – this is often done by holding two outer buttons for an extended period (around a minute).
Programming a Dip Switch Remote to Your Car
- Ensure Remote is Working: Verify the dip switch remote is functioning correctly with your gate.
- Position Remote and Car Button: Hold your working remote close to the button in your car you wish to program.
- Press and Hold Both Buttons: Simultaneously press the button on your gate remote and the chosen button in your car until the car’s indicator light changes, indicating successful programming.
- Test: Test the programmed car button to ensure it operates your gate.
Programming a Rolling Code Remote to Your Car (Two-Step Process)
- Ensure Remote is Working: Confirm your rolling code remote is working with your gate.
- Position Remote and Car Button: Hold your working remote near the car button you want to program.
- Press and Hold Both Buttons: Press and hold the button on your remote and the car button until the car’s indicator light changes.
- Engage Receiver “Learn” Button: Go to your gate receiver and press the “Program” or “Learn” button (as done when programming a new remote directly). The LED light will illuminate.
- Return to Car and Activate: Return to your car and press and hold the programmed button in your car until the gate responds or the car’s indicator light confirms programming.
- Test: Test the programmed car button to ensure it now opens and closes your gate.
Troubleshooting Common Programming Issues
Encountering problems during programming is not uncommon. Here are some troubleshooting tips:
- Remote Not Syncing: Double-check battery life, ensure you are within range of the receiver, and meticulously re-follow programming steps.
- LED Light Not Blinking: Verify power to the receiver and remote. Check if batteries need replacing.
- Gate Not Responding: Confirm compatibility between your remote and receiver. Re-program, ensuring each step is correctly executed. In some cases, a factory reset of the receiver or car system might be necessary (consult manuals).
Always refer to your user manuals for specific troubleshooting guidance related to your models. Patience and careful attention to detail are key to resolving programming challenges.
Benefits of Integrating Your Gate Remote with Your Car
Integrating your gate remote with your car provides numerous benefits:
- Simplified Operation: Control both your car and gate with a single, integrated system.
- Enhanced Safety: Activate your gate without taking your eyes off the road or fumbling for a remote.
- Increased Home Value: Integrated home automation features can add value to your property.
- Modern Convenience: Embrace the ease of technology for everyday tasks.
Compatibility Check: Car and Gate Remote Systems
Before attempting to program your gate remote to your car, ensure compatibility. Most modern cars with built-in systems like Homelink are designed to be compatible with a wide range of gate and garage door openers. However, it’s always best to:
- Consult Car Manual: Check your car’s owner’s manual for specific compatibility information and programming instructions.
- Check Gate Remote Specifications: Review your gate remote’s manual or manufacturer website for compatibility details.
- Professional Consultation: If unsure, consult with a professional installer or your car dealership to confirm compatibility and get expert guidance.
Maintaining Your Programmed Gate Remote System
Once programmed, maintaining your gate remote system ensures long-term reliability.
Regular Check-ups for Your Gate Remote
Perform routine checks on your gate remote and car integration:
- Battery Checks: Regularly check and replace batteries in your handheld remote as needed.
- Cleanliness: Keep remotes and car buttons clean from dirt and debris.
- Range Testing: Periodically test the operational range to ensure consistent performance.
Dealing with Battery Issues
Battery issues are a common cause of remote malfunction. If you notice decreased range or unresponsiveness:
- Replace Batteries: Replace batteries immediately with the correct type as specified in your remote’s manual.
- Proper Installation: Ensure batteries are inserted correctly, matching polarity markings.
Conclusion
Programming your gate remote to your car streamlines your access and enhances your security. By following this comprehensive guide, understanding your system type, and taking a step-by-step approach, you can successfully integrate your gate remote with your car. Enjoy the added convenience and security this integration provides, and remember to maintain your system for continued reliable performance.
For a wide selection of gate remotes and accessories, visit: https://elitegates.net/collections/remote-controls