Imagine the convenience of arriving home and, with just a press of a button in your car, your gate smoothly opens, welcoming you in. No more fumbling for a separate remote or interrupting your drive. Programming your gate opener to work with your car is not just a luxury; it’s a significant upgrade in convenience and security for modern homeowners. This guide will walk you through the process of seamlessly integrating your gate opener remote with your car, ensuring smooth, keyless entry to your property.
Understanding Gate Remote Programming Basics
Before diving into the programming steps, it’s crucial to understand the fundamentals of how gate remote programming works. At its core, programming a gate remote involves establishing communication between your handheld remote and your gate’s receiver unit. Think of it as teaching your gate to recognize a specific signal from your remote. This signal, when correctly transmitted and received, triggers the gate motor to open or close.
Two main components are at play:
- The Receiver Unit: This is the “brain” of your gate opener system, typically a small box located near the gate motor. It’s designed to receive radio signals from your remote.
- The Remote: This is the handheld device you use to send signals to the receiver. Pressing a button on your remote transmits a unique code that the receiver is programmed to recognize.
Proper programming ensures a secure and reliable connection, allowing you to control your gate remotely and efficiently.
Why Program Your Gate Opener Remote?
Programming your gate remote offers several key advantages that enhance both security and daily convenience:
- Enhanced Security: Programming allows you to set unique access codes, ensuring that only authorized devices can open your gate. This drastically reduces the risk of unauthorized entry and enhances your property’s security.
- Convenience and Streamlined Access: A programmed remote means quick and effortless access to your property. No more manual gate operation, especially beneficial during inclement weather or when you’re in a hurry.
- Customizable Features: Many modern gate remotes offer customizable settings such as opening and closing delays. Programming allows you to tailor these features to your specific needs, such as setting a delay if you have a long driveway.
- User Management: Programming enables you to easily add or remove users by programming or deprogramming remotes as needed. This is essential for managing access for family members, guests, or service providers.
Understanding these benefits underscores the value of properly programming your gate remote, especially integrating it with your car for ultimate convenience.
Essential Tools for Gate Remote Programming
Before you begin the programming process, gather these common tools to ensure a smooth and efficient setup:
- Screwdriver: Often needed to access the receiver unit or the battery compartment of your remote. Ensure you have the right type (Phillips-head or flat-head) depending on the screws.
- Ladder (Potentially): If your receiver unit is mounted high, a ladder might be necessary to safely reach it. Exercise caution and ensure stable ladder placement.
- New Batteries (If Applicable): If your remote is older or showing weak signal strength, having new batteries on hand is a good idea. Check your remote’s user manual for the correct battery type.
- User Manual for Your Gate Remote and Car: This is arguably the most crucial tool. Your gate remote and car manuals contain specific instructions for programming and are indispensable for a successful process.
Having these tools prepared will streamline the programming, letting you focus on the steps without interruptions. Always prioritize safety and consult your manuals for specific tool requirements or safety precautions.
Step-by-Step Guide: How to Program Your Gate Remote
Programming your gate remote is generally a straightforward process, but the exact steps can vary depending on the type of remote you have. Here’s a detailed guide to cover the most common scenarios.
Step 1: Identifying Your Gate Remote Model
The first and most critical step is to accurately identify your gate remote model. Different models, even from the same manufacturer, can have vastly different programming procedures.
- Consult the User Manual: Your gate remote should have come with a user manual. This manual is your best resource for finding the model number and specific programming instructions.
- Check the Remote Itself: Look for a model number or manufacturer name printed on the remote casing, often on the back or inside the battery compartment.
- Manufacturer’s Website: If you can identify the manufacturer, their website is another excellent resource. Many manufacturers have support sections where you can identify your model and download manuals.
- Email a Picture for Expert Help: If you’re unsure, consider taking clear pictures of your remote (front and back) and emailing them to a specialized gate remote supplier. They can often help identify your model and suggest compatible replacements if needed.
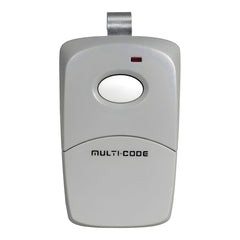
Alt Text: Multicode 3089 dip switch gate remote example for model identification.
Alt Text: Linear DT1 dip switch gate remote example for model identification.
Once you have confidently identified your gate remote model, you can proceed to the correct programming method. Gate remotes typically fall into two main categories based on their coding technology: fixed-code (dip switch) and rolling code.
Step 2: Programming Fixed-Code (Dip Switch) Gate Remotes
Fixed-code remotes, often using dip switches, are an older but still common technology. Programming these involves physically matching switch settings between the remote and receiver.
Programming Steps for Dip Switch Remotes:
- Locate the Receiver Unit: Find the receiver box near your gate opener. It may have an antenna (wire or coax cable).
- Access Receiver Dip Switches: Open the receiver unit to find the dip switches. This usually involves unscrewing a cover.
- Locate Remote Dip Switches: Similarly, access the dip switches on your remote. They are often found under the battery cover.
- Match Dip Switch Positions: Carefully observe the position (ON or OFF, sometimes marked as + or – or 1 and 0) of each dip switch in the receiver. Then, set the dip switches on your remote to exactly match this configuration.
- Test: Close the remote and receiver, and test the gate operation.
Changing the Code: To change the access code, alter the dip switch pattern on both the receiver and all remotes you want to use. Ensure the new pattern is identical on all devices.
Step 3: Programming Rolling Code Gate Remotes
Rolling code technology is more modern and enhances security by changing the code each time the remote is used, preventing code theft. Programming these remotes usually involves a “Learn” or “Program” button on the receiver.
Alt Text: LiftMaster 892LT rolling code gate remote example for model identification.
Alt Text: EG642 rolling code gate remote example for model identification.
Programming Steps for Rolling Code Remotes:
- Locate the Receiver Unit: As with dip switch remotes, find the receiver near your gate motor.
- Find the “Learn” Button: Look for a button labeled “Learn,” “Program,” or similar on the receiver unit.
- Press the “Learn” Button: Press and release the “Learn” button. An LED indicator light on the receiver should turn on, indicating it’s in programming mode.
- Press the Remote Button: Within 30 seconds (typical timeframe, check your manual), press the button on your remote that you wish to use to open the gate.
- Wait and Test: The receiver’s LED light should blink or turn off to indicate successful programming. Wait a few moments, then test the remote by pressing the programmed button.
Integrating Your Gate Remote with Your Car
The ultimate convenience is controlling your gate directly from your car’s built-in remote system, if equipped. Most modern cars with garage door opener buttons (often labeled HomeLink®, Car2U®, or similar) can be programmed to operate gate openers as well.
Before you start: Consult your vehicle’s owner’s manual for specific instructions on programming its built-in remote system. You may need to clear existing codes or enter a programming mode.
Programming a Dip Switch Remote to Your Car
Programming a dip switch remote to your car is generally a simpler process:
- Ensure Remote is Working: Verify that your dip switch remote is currently functioning correctly with your gate.
- Position Remote and Car Button: Hold your existing gate remote close to the button in your car you want to program.
- Press and Hold Both Buttons: Simultaneously press and hold the button on your handheld remote and the desired button in your car.
- Wait for Car to Learn: Keep holding both buttons until your car indicates successful programming. This might be a flashing light or a message on your car’s display (refer to your car’s manual).
- Test: Test the programmed button in your car to operate your gate.
Programming a Rolling Code Remote to Your Car (Two-Step Process)
Integrating rolling code remotes with car systems often requires a two-step “learning” process for enhanced security:
-
Initial Car Programming (Remote to Car):
- Ensure your rolling code remote is working with your gate.
- Hold your remote close to the car button you wish to program.
- Press and hold both the remote button and the car button until the car indicates it has learned the signal (light flashes, message appears).
-
Receiver Synchronization (Car to Gate Receiver):
- Go to your gate receiver unit.
- Press the “Learn” or “Program” button on the receiver (just as you would when programming a new handheld remote). The LED should light up.
- Return to your car and press and hold the car button you just programmed until the gate operates or the car indicates programming is complete (may require holding for a longer duration than initial car programming).
- Test the car button to ensure it now reliably opens your gate.
Troubleshooting Common Programming Issues
Encountering issues during programming is not uncommon. Here are some troubleshooting tips:
- Remote Not Syncing: Ensure you are within range of the receiver and that batteries in your remote are fresh. Double-check that you are following the correct programming steps for your specific remote model.
- LED Light Not Blinking: If the LED on the receiver doesn’t light up when you press the “Learn” button, ensure power is reaching the receiver. Check for any tripped breakers or power issues.
- Gate Not Responding: After programming, if the gate doesn’t respond, re-verify all steps. You may need to repeat the programming sequence. In rolling code systems, ensure you completed both the car-to-remote and car-to-receiver steps if required.
- Factory Reset (As Last Resort): If issues persist, some receivers and car systems allow a factory reset. Consult your manuals for reset procedures, but note this will erase all programming and you’ll need to start from scratch.
Always re-read your user manuals and systematically re-attempt the programming steps. Patience and attention to detail are key.
Benefits of Adding Your Gate Remote to Your Car
Integrating your gate remote with your car offers compelling advantages:
- Ultimate Convenience: Control your gate directly from your car’s dashboard. No need to carry and fumble for separate remotes.
- Streamlined Entry: Arrive home and open your gate without interrupting your driving process. A single button press is all it takes.
- Enhanced Security and Peace of Mind: Having the gate remote integrated into your car means you always have it with you when you’re driving, reducing the chance of forgetting or losing a separate remote.
Compatibility Check: Car and Gate Remote
While many cars and gate openers are designed for compatibility, it’s essential to confirm before attempting to program:
- Car’s Built-in System: Check your car’s manual for information on its built-in remote system (HomeLink®, Car2U®, etc.) and compatibility with gate openers.
- Gate Opener Compatibility: Some gate opener manuals or manufacturer websites list compatible car systems.
- Professional Consultation: If unsure, consult a professional gate installer or car audio specialist. They can assess compatibility and advise on any necessary adapters or solutions.
Maintaining Your Programmed Gate Remote System
Once your gate remote is programmed and integrated with your car, simple maintenance will ensure long-term reliability:
Regular Check-ups
- Battery Checks: Periodically check the batteries in your handheld remote (if applicable). Replace them proactively to avoid unexpected failures.
- Cleanliness: Keep your remotes and car buttons clean and free from dirt or debris that could interfere with button operation.
Dealing with Battery Issues
- Performance Drops: If you notice reduced range or responsiveness, battery replacement is likely needed.
- Correct Battery Type: Always use the correct type of replacement batteries as specified in your remote’s manual.
- Proper Installation: Ensure batteries are inserted with correct polarity (+ and – ends oriented properly).
Conclusion
Programming your gate opener to your car is a worthwhile endeavor that significantly boosts convenience and streamlines your daily routine. By following this comprehensive guide, understanding your remote type, and carefully executing the programming steps, you can achieve seamless, keyless gate entry. Enjoy the ease and security of controlling your gate right from your car!
For a wide selection of gate remotes and accessories, visit: https://elitegates.net/collections/remote-controls