Imagine the convenience of opening your gate without fumbling for a separate remote. Programming your gate opener remote to your car allows you to do just that, streamlining your entry and exit while enhancing your home security. This guide will walk you through the process, ensuring you can effortlessly integrate your gate remote with your vehicle’s system.
Understanding Gate Remote Programming Basics
Before we delve into the steps, let’s understand the fundamentals of gate remote programming. At its core, programming involves establishing communication between your handheld remote and your gate’s receiver unit. This receiver, typically located near your gate motor, acts as the central hub, translating the signals from your remote into the action of opening or closing your gate.
Think of it as a coded language. Your remote transmits a specific signal, and the receiver, once programmed to understand that signal, activates the gate. Proper programming creates a secure and reliable link, ensuring only authorized devices can operate your gate.
Why Program Your Gate Remote to Your Car?
Programming your gate remote to your car isn’t just about convenience; it’s about enhancing your daily life and security in several ways:
- Ultimate Convenience: No more searching for a separate remote. Operate your gate with a simple press of a button already built into your car’s interior.
- Enhanced Security: Reduce clutter and the risk of losing multiple remotes. Having one less device to manage can simplify your security routine.
- Streamlined Entry and Exit: Especially useful in inclement weather, you can open your gate without rolling down your window or leaving your car, adding an extra layer of safety and comfort.
- Modern Integration: Integrating your gate with your car’s system brings a modern, seamless feel to your home automation.
Now that you understand the benefits, let’s explore the tools you’ll need to get started.
Essential Tools for Programming Your Gate Remote
Gathering the necessary tools beforehand will make the programming process smoother and more efficient. While the specifics can vary slightly depending on your gate and car models, you’ll generally need:
- Your Gate Remote: Ensure it has fresh batteries if it’s an older remote.
- Your Car’s User Manual: This is crucial for understanding your car’s built-in remote programming system (like HomeLink® or Car2U®).
- A Screwdriver: Potentially needed to access the receiver unit on your gate opener.
- A Ladder (Possibly): If your receiver unit or programming button is located at a height, a ladder might be necessary for safe access.
- User Manual for Your Gate Opener: This manual contains specific instructions for your gate opener model, which are vital for successful programming.
Having these tools ready will minimize interruptions and ensure you can follow the programming steps without delays. Always prioritize safety and consult your manuals before proceeding.
Step-by-Step Guide: Programming Your Gate Remote
Let’s break down the programming process into manageable steps. The exact procedure will depend on whether you have a fixed-code (dip switch) remote or a rolling code remote, and the type of in-car system you are using.
Identifying Your Gate Remote Type
Before you begin, it’s crucial to determine the type of gate remote you have. This will dictate the programming method.
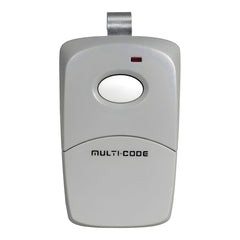
- Dip Switch Remotes (Fixed Code): These remotes use small switches (dips) inside the remote and receiver. The code is set by the position of these switches (up or down). Common brands include Multicode and Linear.
- Rolling Code Remotes: These remotes use a constantly changing code for enhanced security. They typically require pressing a “Learn” or “Program” button on the receiver unit. Brands like LiftMaster are common examples.
If you are unsure, consult your gate opener’s manual or the remote itself. Identifying the correct type is the first step to successful programming.
Programming Fixed-Code (Dip Switch) Remotes to Your Car
For dip switch remotes, the process usually involves a direct code transfer. Here’s a general guide:
- Ensure Your Remote Works: Verify your gate remote is functioning correctly with your gate before attempting to program it to your car.
- Locate Car’s Programming Button: Refer to your car’s manual to find the button you want to program for your gate (often on the rearview mirror or visor).
- Simultaneous Press: Hold your working gate remote close to the car’s programming button. Press and hold a button on your gate remote and the chosen button in your car simultaneously.
- Wait for Signal: Keep holding both buttons until your car indicates it has learned the signal. This might be a flashing light or a message on your car’s display (refer to your car manual).
- Test: Test the programmed button in your car to see if it opens your gate.
Programming Rolling Code Remotes to Your Car (Two-Step Process)
Rolling code remotes require a two-step process because of their advanced security features:
Step 1: Car Learns Remote Signal
- Working Remote Check: Ensure your gate remote is working with your gate.
- Car Programming Mode: Consult your car’s manual to enter the programming mode for your built-in remote system. This often involves pressing and holding a button until a light flashes differently. You might need to clear existing codes first (usually by pressing two outer buttons for about a minute – check your manual).
- Signal Transfer: Hold your working gate remote close to the car’s button you wish to program. Press and hold a button on your gate remote and the car button simultaneously until the car indicates it has learned the signal (light flash, display message).
Step 2: Gate Receiver Learns Car Signal
- Locate Receiver Program Button: Go to your gate opener receiver unit and locate the “Program” or “Learn” button.
- Press Receiver Program Button: Press and release the “Program” button on the receiver. An LED light on the receiver should turn on, indicating it’s in learning mode.
- Activate Car Button: Immediately return to your car and press and hold the button you programmed in Step 1 until your gate activates or the receiver light indicates successful programming (this might involve flashing or turning off – refer to your gate opener manual).
- Test: Test the programmed car button to ensure it opens and closes your gate reliably.
Troubleshooting Common Programming Issues
Encountering problems during programming is not uncommon. Here are some troubleshooting tips:
- Remote Not Syncing:
- Battery Check: Ensure your gate remote batteries are fresh.
- Range: Be close enough to both your car and the gate receiver during programming.
- Clear Codes: If you’ve tried programming multiple times, try clearing existing codes in your car’s system (refer to your car manual) and start again.
- LED Not Blinking (Receiver or Car):
- Manual Review: Double-check the manuals for both your car and gate opener to ensure you are following the correct steps for your specific models.
- Reset: Some receivers or car systems may require a reset. Consult the manuals for reset procedures.
- Gate Not Responding:
- Programming Mode Duration: Ensure you are pressing the “Program” button on the receiver for the correct duration. Programming modes are often time-sensitive.
- Compatibility: Verify that your car’s system is compatible with your gate remote’s frequency and coding type.
If troubleshooting steps don’t resolve the issue, consider consulting a professional gate technician or your car dealership’s service department for assistance.
Maintaining Your Car-Programmed Gate Remote
Once you’ve successfully programmed your gate remote to your car, proper maintenance will ensure long-term reliability.
- Regular Battery Checks: Periodically check the batteries in your gate remote, even if you primarily use the car-integrated system. Weak batteries can sometimes cause intermittent issues.
- Car System Maintenance: While car-integrated systems are generally low-maintenance, be aware of your car’s overall electrical health. Issues with your car’s electrical system could indirectly affect the remote programming.
- Reprogramming if Necessary: If you change cars or experience issues with the programming, be prepared to reprogram your system following the steps outlined in this guide.
Conclusion: Enjoy the Convenience
Programming your gate opener remote to your car is a worthwhile endeavor that significantly enhances convenience and security. By following this comprehensive guide and taking your time with each step, you can seamlessly integrate your gate access into your vehicle. Enjoy the ease of one-touch gate operation and the peace of mind of streamlined home access control.