Controlling your property’s gate remotely offers significant convenience and enhanced security. Programming your gate clicker, or remote, to work with your car takes this convenience a step further, allowing you to operate your gate seamlessly from your vehicle. This guide will walk you through the process of programming your gate remote and integrating it with your car’s built-in system, ensuring smooth access to your property every time.
Understanding Gate Remote Programming Basics
Before diving into the specifics of car integration, it’s crucial to understand the fundamentals of gate remote programming. At its core, programming a gate remote involves establishing a communication link between your handheld remote and the gate’s receiver unit. This receiver, typically located near your gate motor, interprets signals from your remote to activate the gate’s opening and closing mechanisms.
Two primary components are involved:
- Receiver Unit: This is the electronic device attached to your gate system that receives radio signals from the remote. It acts as the brain, processing the signal and commanding the gate motor to operate.
- Remote Control (Clicker): This handheld device transmits a unique radio frequency signal to the receiver unit, instructing the gate to open or close when a button is pressed.
Understanding this basic interaction is the first step in successfully programming your gate clicker and integrating it with your car.
Why Program Your Gate Clicker? The Benefits
Programming your gate remote is not just about convenience; it’s about enhancing security and streamlining your daily routines. Here are key advantages:
- Enhanced Security: Programming allows you to set unique access codes, ensuring only authorized individuals can operate your gate. This personalized control adds a layer of security, preventing unauthorized entry to your property.
- Convenience and Efficiency: No more fumbling for separate remotes. Integrating your gate clicker with your car means one less device to manage, simplifying your entry and exit process.
- Customization and Control: Many gate remotes offer advanced features like adjustable opening and closing delays. Programming unlocks these customization options, allowing you to tailor the gate’s operation to your specific needs, especially useful for longer driveways or coordinated actions.
- Flexibility for User Management: As your needs evolve, programming allows you to easily add or remove users by reprogramming remotes or car systems, providing ongoing control over property access.
Now that we’ve established the importance and benefits, let’s explore the tools you’ll need to get started.
Essential Tools for Gate Remote Programming
Before you begin programming your gate remote, gather the following tools to ensure a smooth and efficient process:
- Screwdriver: Often needed to access the receiver unit or battery compartment of your remote.
- Ladder (Potentially): Depending on the location of your receiver unit, especially for garage door openers, a ladder might be necessary for safe access.
- New Batteries (If Applicable): For older remotes, having fresh batteries on hand is crucial to eliminate power issues as a potential programming obstacle.
- Gate Remote User Manual: This is arguably the most important tool. Your user manual contains specific instructions for your gate remote model, including programming steps, troubleshooting tips, and safety information. Always refer to your manual for model-specific guidance.
It’s also wise to check if your specific gate remote requires any specialized tools, such as programming adapters or devices, as mentioned in some user manuals. Having everything prepared beforehand will save time and minimize frustration during the programming process.
With the necessary tools ready, you’re now prepared to proceed with the step-by-step guide to programming your gate remote.
Step-by-Step Guide to Program Your Gate Remote
Programming your gate remote might seem complex, but breaking it down into manageable steps simplifies the process significantly. Follow this guide to successfully program your gate remote.
Step 1: Identifying Your Gate Remote Model
The first critical step is to accurately identify your gate remote model. Programming methods vary between models, so using the correct instructions is essential.
- Consult the User Manual: Your user manual should clearly state the model number and provide programming instructions specific to your device.
- Check the Remote Itself: Look for a model number or manufacturer name printed on the remote casing, often on the back or inside the battery compartment.
- Manufacturer’s Website: If you can’t locate the manual or model number, visit the manufacturer’s website. Many manufacturers have product identification guides or customer support to help you determine your model.
- Contact Support: If you are still unsure, contacting the gate or remote manufacturer’s customer support with a picture of your remote can help them identify it for you.
Once you have confidently identified your gate remote model, you can proceed with the appropriate programming instructions.
Step 2: Programming Fixed-Code Gate Remotes (Dip Switch)
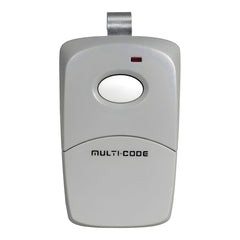
Fixed-code remotes, often using dip switches, are an older but still common type. Brands like Multicode and Linear frequently utilize this technology. Here’s how to program them:
- Locate the Receiver Unit: Find the receiver box, usually near the gate motor. It may have an antenna wire.
- Access Dip Switches on Receiver: Open the receiver unit to find the dip switches. These are small switches, often numbered, that can be toggled “up” or “down”.
- Access Dip Switches on Remote: Open your remote to locate its dip switches, usually in the battery compartment.
- Match Dip Switch Positions: Set the dip switches on your remote to exactly match the pattern of the dip switches on the receiver unit.
- Change the Code (Optional): To create a new code, change the dip switch positions on both the receiver and the remote to a new, matching pattern.
Programming is now complete. Test the remote by pressing a button while within range of the gate to ensure it opens and closes correctly.
Step 3: Programming Rolling Code Gate Remotes
Rolling code remotes are more secure and common in modern systems. Here’s how to program them:
- Locate the Receiver Unit: Find the receiver box near the gate motor.
- Find the “Program” or “Learn” Button: Locate the “Program” or “Learn” button on the receiver unit. This button activates the programming mode.
- Press the Programming Button: Press and release the “Program” or “Learn” button on the receiver. An LED indicator light on the receiver should illuminate, indicating it’s in programming mode.
- Press Remote Button: Immediately press and hold the desired button on your gate remote that you wish to program.
- Wait for Confirmation: The LED light on the receiver should blink or turn off to indicate successful programming. Some systems may beep or make a clicking sound.
Programming is complete. Test the remote by pressing the programmed button to confirm the gate operates as expected.
Integrating Your Gate Remote with Your Car
Integrating your gate remote with your car’s built-in system offers unparalleled convenience. Most modern cars with built-in garage door opener systems (like HomeLink or Car2U) can be programmed to operate gate clickers as well.
To program your gate clicker to your car, you will generally use your car’s built-in system. Consult your vehicle’s owner’s manual for specific instructions on accessing the programming mode for your car’s garage door opener system. The general process involves these steps:
- Clear Existing Codes (Recommended): To start fresh, it’s often recommended to clear any previously programmed codes from your car’s system. This is usually done by pressing and holding the two outer buttons of the car’s built-in system simultaneously for approximately 20-30 seconds, until the indicator light blinks rapidly.
- Enter Programming Mode: Refer to your car’s manual, but typically, this involves pressing and holding one of the car’s built-in buttons you want to program until the indicator light begins to blink slowly or differently, indicating it’s in learning mode.
Once your car is in programming mode, follow the steps below based on your remote type:
Programming a Dip Switch Remote to Your Car
- Ensure Remote is Working: Verify that your dip switch remote is functioning correctly and has fresh batteries if needed.
- Position Remote and Car Button: Hold your working gate remote close to the car’s button you are programming.
- Simultaneous Press: Press and hold the button on your gate remote and the chosen button in your car simultaneously.
- Wait for Programming Signal: Continue holding both buttons until your car’s indicator light blinks rapidly or changes in a way that indicates successful programming (refer to your car’s manual for the specific signal).
- Test: Test the programmed car button to ensure it now operates your gate.
Programming a Rolling Code Remote to Your Car (Two-Step Process)
Programming rolling code remotes to cars often requires a two-step “learning” process for enhanced security:
-
Initial Car Programming (Remote to Car):
- Ensure Remote is Working: Verify your rolling code remote is functional.
- Position Remote and Car Button: Hold your working gate remote close to the car button you’re programming.
- Simultaneous Press: Press and hold the button on your gate remote and the chosen button in your car at the same time.
- Wait for Car Programming Signal: Hold until your car’s indicator light changes to indicate it has learned the frequency from your remote (refer to your car manual).
-
Receiver Learning (Car to Gate Receiver):
- Access Gate Receiver: Go to your gate receiver unit.
- Press “Program” Button on Receiver: Press the “Program” or “Learn” button on the gate receiver (as you would when programming a new handheld remote directly to the gate). The LED light on the receiver should turn on.
- Return to Car and Activate: Immediately return to your car and press and hold the car button you just programmed (the one now linked to your gate remote’s frequency). Hold it until the gate receiver’s LED light blinks or turns off, indicating it has learned the signal from your car.
-
Test: Test the programmed car button to confirm it now opens and closes your gate.
Troubleshooting Common Programming Issues
Encountering issues during programming is not uncommon. Here are some troubleshooting tips:
- Remote Not Syncing:
- Battery Check: Ensure your remote batteries are new and correctly installed.
- Range: Be within close range of the receiver unit during programming.
- Interference: Minimize potential radio interference from other devices.
- LED Not Blinking/Illuminating:
- Power to Receiver: Check that the receiver unit is powered on.
- Button Functionality: Ensure the “Program” or “Learn” button on the receiver is functioning correctly.
- Manual Review: Double-check your user manuals for specific troubleshooting steps related to LED indicators.
- Gate Not Responding After Programming:
- Correct Frequency: Verify that your remote and receiver are compatible in terms of frequency (though this is less common with modern systems).
- Programming Mode Timeout: Some receivers have a limited time window for programming mode. If you take too long, you may need to restart the process.
- Factory Reset: As a last resort (and after consulting your manual), consider a factory reset of the receiver and restart the programming process.
If issues persist, consult your gate operator’s user manual or contact a professional gate technician for assistance.
Benefits of Car Integration: Ultimate Convenience
Adding your gate remote to your car provides a seamless and convenient access solution. Imagine arriving home and opening your gate with a simple press of a button on your dashboard, without needing to search for a separate remote.
- Clutter Reduction: Eliminates the need for multiple remotes cluttering your car’s visor or console.
- Always Accessible: Your gate control is always within reach, integrated into your vehicle’s controls.
- Enhanced Security (in some cases): Some car systems offer rolling code technology, potentially adding a layer of security depending on your gate system.
- Streamlined Entry/Exit: Simplifies your daily routine, making entering and leaving your property faster and more convenient.
Compatibility Check: Car and Gate Remote System
Before attempting car integration, perform a quick compatibility check:
- Car’s Manual: Check your car’s owner’s manual for information on its built-in garage door opener system (HomeLink, Car2U, etc.) and its compatibility with gate openers.
- Gate Remote Type: Identify if your gate remote is fixed-code (dip switch) or rolling code. Rolling code systems are generally more compatible with car systems.
- Online Compatibility Tools: Some car and gate remote manufacturers offer online compatibility checkers.
- Professional Consultation: If unsure, consult a car audio/electronics specialist or a gate installation professional to confirm compatibility.
While most modern car systems are designed to be broadly compatible, verifying beforehand can save time and frustration.
Maintaining Your Programmed Gate Remote System
Once you have successfully programmed your gate remote and integrated it with your car, proper maintenance ensures long-term reliability.
Regular Check-ups
- Battery Inspection: Periodically check your handheld gate remote for battery corrosion or leakage. Replace batteries promptly when needed.
- Cleanliness: Keep your remotes clean and free from dirt and debris, which can interfere with button operation.
- Range Testing: Occasionally test the range of your remotes to ensure they are still transmitting effectively. Reduced range can indicate battery issues or potential remote malfunction.
Addressing Battery Issues
- Performance Decline: If you notice your gate is less responsive or the remote requires closer proximity to operate, battery replacement is likely needed.
- Correct Battery Type: Always replace batteries with the correct type specified in your remote’s user manual.
- Proper Installation: Ensure batteries are inserted with the correct polarity (+ and – ends aligned properly).
Conclusion
Programming your gate clicker to your car is a worthwhile investment in convenience and streamlined access control. By following this comprehensive guide, you can confidently program your gate remote and integrate it with your car, enjoying the ease of single-remote operation. Remember to consult your user manuals for specific model instructions and troubleshooting tips. With a little patience, you’ll be enjoying the benefits of seamless gate and car integration in no time.
For a wide selection of gate remotes and accessories, visit: https://elitegates.net/collections/remote-controls