Gaining seamless access to your gated community is a daily convenience many residents appreciate. Programming your community gate remote to your car takes this convenience a step further, eliminating the need to fumble for a separate remote. This guide will provide you with a comprehensive understanding of how to program your community gate remote to your car, ensuring a smooth and secure entry every time.
Understanding Gate Remote Programming Basics
Before diving into the programming process, it’s essential to understand the fundamentals of how gate remotes work. Gate remote programming is essentially setting up a communication channel between your handheld remote and the gate’s receiver system. This process allows your remote to send the correct signal to activate the gate, granting you access to your community.
At the heart of this system are two key components: the receiver unit and the remote. The receiver unit is typically a small device installed near the community gate, acting as the central point for receiving signals. It then relays these signals to the gate operator, triggering it to open or close. The remote, on the other hand, is your handheld transmitter. When you press a button, it sends a coded signal to the receiver.
Why is programming your community gate remote to your car such a beneficial upgrade?
The Convenience and Security of Car Integration
Programming your community gate remote to your car offers several advantages, especially within a community setting:
- Enhanced Convenience: Imagine arriving at your community gate and simply pressing a button built into your car’s visor or dashboard, rather than searching for a separate remote. This integration streamlines your entry process, making it quicker and more convenient, particularly in inclement weather.
- Increased Security: Having a dedicated button within your car reduces the risk of losing or misplacing your gate remote. It also minimizes the chance of unauthorized access, as the remote is always securely within your vehicle.
- Streamlined Access: For households with multiple drivers, programming the gate remote to each car ensures everyone enjoys effortless access without needing to share or transfer a single remote.
- Reduced Clutter: Consolidating your gate remote into your car helps declutter your keychain and car interior, simplifying your everyday carry.
Now that you understand the benefits, let’s explore the tools you’ll need to get started.
Essential Tools for Programming Your Gate Remote
Before you begin programming, gather these common tools to ensure a smooth process:
- Screwdriver: You might need a screwdriver (usually Phillips or flathead) to access the receiver unit or battery compartment of your remote, depending on the model.
- User Manuals: Crucially, have both your gate remote’s user manual and your car’s owner’s manual readily available. These manuals contain specific instructions for your particular models and are indispensable for successful programming.
- Fresh Batteries: If your gate remote is older or has been used frequently, consider replacing the batteries with new ones to ensure optimal signal strength during programming.
For certain gate remote models, you might encounter additional requirements. Always consult your user manuals for any specific tools or steps unique to your system. Having everything prepared beforehand will make the programming process efficient and less frustrating.
Let’s move on to the step-by-step guides for programming your community gate remote.
Step-by-Step Guide to Program Your Community Gate Remote
The programming process varies depending on the type of gate remote you have. The two primary types are dip-switch remotes and rolling code remotes. Let’s identify which type you have and then proceed with the corresponding instructions.
Identifying Your Gate Remote Type: Dip Switch vs. Rolling Code
Determining your remote type is the first crucial step.
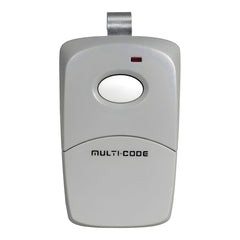
- Dip Switch Remotes: These remotes use a series of tiny switches (dips) inside the remote and receiver. They are often older models. To identify a dip switch remote, look for a small compartment, often near the battery, that can be opened to reveal a set of switches, usually numbered 1-8 or 1-10.
- Rolling Code Remotes: Rolling code remotes are more modern and offer enhanced security. They transmit a unique code that changes with each use, preventing code theft. These remotes typically have a “Program” or “Learn” button on either the remote itself or the receiver unit. They do not have dip switches.
If you are unsure, consult your gate remote’s user manual or look for model numbers or manufacturer information on the remote itself to search online. You can also contact your community management for information about the gate system.
Once you’ve identified your remote type, follow the appropriate programming steps below.
Programming Process for Dip Switch Gate Remotes
Dip switch remotes are programmed by matching the switch positions on the remote to the receiver.
- Locate the Receiver Unit: Find the receiver unit for your community gate. This is usually a box mounted near the gate operator. It may have an antenna. Accessing it might require a key or authorization from community management. Important: Always ensure you have permission to access and program the community gate receiver.
- Access Dip Switches on Receiver: Open the receiver unit to locate the dip switches. Note their current positions (up or down). It’s helpful to take a picture for reference.
- Access Dip Switches on Remote: Open your gate remote to access its dip switches.
- Match Switch Positions: Using a small screwdriver or pen, adjust the dip switches on your remote to exactly match the positions of the dip switches on the receiver unit.
- Test: Close the remote and receiver units. Test the remote to ensure it operates the gate.
If you wish to change the gate code entirely (which is generally not recommended for community gates without authorization), you would change the dip switch positions on both the receiver and all remotes to a new matching configuration.
Programming Process for Rolling Code Gate Remotes
Rolling code remotes use a “Learn” button to synchronize with the receiver.
- Locate the Receiver Unit: As with dip switch remotes, locate the community gate receiver unit. Again, ensure you have proper authorization to access it.
- Find the “Program” or “Learn” Button: On the receiver unit, locate the “Program” or “Learn” button. It’s usually a small, colored button.
- Press the “Program” Button: Press and release the “Program” button on the receiver. An LED indicator light on the receiver should illuminate, indicating it’s in programming mode. You usually have a limited time (e.g., 30 seconds) in programming mode.
- Press Remote Button: Within the time limit, press and hold the button on your gate remote that you wish to use to open the gate.
- Wait for Confirmation: The receiver’s LED light may blink or turn off to indicate successful programming.
- Test: Test your remote to ensure it now operates the gate.
Integrating Your Gate Remote with Your Car’s System
Now, let’s integrate your programmed gate remote with your car’s built-in system. Most modern cars with garage door opener functionality (often branded as HomeLink®, Car2U®, etc.) can be programmed to learn gate remote signals.
Refer to your car’s owner’s manual for specific instructions on programming your car’s built-in system. The general process involves these steps:
- Enter Car Programming Mode: Typically, this involves pressing and holding one or two buttons in your car (often located on the visor or rearview mirror) until an indicator light blinks, signaling programming mode. Your car’s manual is essential here as button combinations vary. You may need to clear existing codes first, as described in your car’s manual (often by holding outer buttons for an extended period).
Programming a Dip Switch Remote to Your Car
- Working Remote: Ensure your dip switch gate remote is working correctly and can open the gate.
- Proximity: Hold your working gate remote close to the button in your car you want to program.
- Simultaneous Press: Press and hold the button on your gate remote and the button in your car’s built-in system simultaneously.
- Hold Until Programmed: Continue holding both buttons until your car’s indicator light blinks rapidly or changes pattern, indicating successful programming.
- Test: Test the programmed button in your car to operate the community gate.
Programming a Rolling Code Remote to Your Car (Two-Step Process)
Rolling code systems often require a two-step “learning” process for car integration due to their enhanced security.
- Working Remote: Ensure your rolling code gate remote is working correctly.
- Proximity & Initial Press: Hold your working gate remote close to the car button you want to program. Press and hold both the remote button and the car button simultaneously until the car’s indicator light changes (as in the dip switch process).
- Receiver “Learn” Button: Go to the community gate receiver unit (again, with authorization). Press the “Program” or “Learn” button on the receiver (as you did when initially programming the remote). The LED light will illuminate.
- Car Button “Learn” Press: Return to your car within the time limit (usually 30 seconds). Press and hold the programmed button in your car until the car’s indicator light blinks rapidly or changes again, confirming it has learned the rolling code from the receiver.
- Test: Test the programmed car button to operate the community gate.
Troubleshooting Common Programming Issues
Encountering problems during programming is not uncommon. Here are some troubleshooting tips:
- Remote Not Syncing: Ensure fresh batteries in your remote. Double-check you are following the correct programming steps for your remote type (dip switch or rolling code). Verify you are within range of the receiver during programming.
- LED Light Not Blinking (Receiver or Car): Ensure the receiver and car are actually entering programming mode when you press the buttons. Refer to manuals for correct button sequences and timing.
- Gate Not Responding After Programming: Double-check all dip switch positions (for dip switch remotes). For rolling code remotes, ensure you completed both the remote programming and car “learning” steps correctly, including pressing the “Learn” button on the receiver. You might need to repeat the entire process.
- Range Issues: If the range is poor after programming, ensure the receiver antenna is unobstructed and in good condition.
If issues persist, consult your gate remote’s user manual, your car’s owner’s manual, or contact a professional gate technician or your community management for assistance.
Maintaining Your Car-Programmed Community Gate Remote
Once successfully programmed, proper maintenance ensures long-term reliable operation.
Regular Check-ups
Perform periodic checks of your gate remote and car integration:
- Test Regularly: Operate your gate with the car button regularly to ensure it’s still working as expected.
- Battery Checks: While car systems are powered by the car, the handheld remotes within them still rely on batteries. If you use a separate handheld remote programmed to your car system, check its batteries periodically.
- Clean Buttons: Keep the car buttons clean and free from debris.
Dealing with Battery Issues (If Applicable)
If you experience unresponsiveness or reduced range, especially with a separate handheld remote programmed to your car system, battery replacement is the first step. Use the correct battery type as specified in your remote’s manual and ensure proper insertion.
Conclusion
Programming your community gate remote to your car is a worthwhile upgrade that enhances convenience and security. By understanding the type of remote you have and carefully following the step-by-step instructions, you can achieve seamless gate access from the comfort of your vehicle. Remember to prioritize safety, always have proper authorization before accessing community gate equipment, and consult your manuals for specific details related to your devices. Enjoy the ease and efficiency of integrated gate access!
For a wide selection of gate remotes and accessories, visit: https://elitegates.net/collections/remote-controls
