Gaining seamless access to your community is a modern convenience we often take for granted. Programming your gate remote to your car’s built-in system elevates this convenience, allowing you to control your community gate without fumbling for a separate remote. This guide provides a detailed walkthrough on how to program your community gate remote to your car, ensuring a smooth and secure entry every time.
Understanding the Essentials of Gate Remote Programming
Before diving into the programming process, it’s crucial to understand the basic principles of how gate remotes communicate with gate systems. Gate remote programming is essentially the process of teaching your remote to speak the same language as your gate’s receiver. This receiver unit, typically located near your gate operator, is the brain that interprets signals from your remote and activates the gate mechanism.
Think of it as setting up a secure line of communication. Your remote sends a unique signal, and the receiver, once programmed to recognize this signal, responds by opening or closing the gate. This digital handshake ensures only authorized devices can operate the gate, enhancing the security of your community.
Why is this programming so important? Let’s explore the benefits.
Why Programming Your Gate Remote is Crucial
Properly programmed gate remotes are the cornerstone of secure and convenient community access. They offer several key advantages:
- Enhanced Security: Programming allows for unique codes, preventing unauthorized access. This means only residents with correctly programmed remotes can enter, significantly boosting community security.
- Convenience and Efficiency: No more stopping to manually enter codes or using key cards. A simple press of a button from your car provides quick and easy access, especially during inclement weather or when you have a car full of passengers.
- Customization and Control: Many gate remotes and systems offer advanced features like setting temporary access codes, scheduling access times, or even monitoring gate usage (in more advanced community systems). Programming unlocks these functionalities.
- Streamlined Daily Routine: Integrating your gate remote with your car simplifies your daily commute. Imagine approaching your community gate and opening it effortlessly without interrupting your drive.
However, programming isn’t a one-time setup. You might need to reprogram if you change remotes, add a new vehicle, or if the system requires updates. Understanding the process empowers you to manage your access efficiently.
Now, let’s equip ourselves with the necessary tools before we start programming.
Essential Tools for Programming Your Gate Remote
Gathering the right tools beforehand streamlines the programming process. While the exact tools may vary slightly depending on your specific gate and car system, here are the typical items you’ll need:
- Screwdriver Set: Both Phillips head and flathead screwdrivers might be necessary to access the receiver unit or battery compartment of your remote.
- Ladder (Potentially): If your gate receiver unit is mounted high, a step ladder might be needed for safe access. Always prioritize safety when using a ladder.
- New Batteries (If Applicable): If your remote is older or has been used extensively, having fresh batteries on hand is a good idea to rule out battery issues during programming. Check your remote’s battery type beforehand.
- User Manuals: Crucially, have the user manuals for both your gate remote and your car’s HomeLink® or built-in remote system. These manuals are your primary guides and contain specific instructions for your devices.
- Programming Adapter or Device (Potentially): Some advanced gate systems or car integration methods may require a specific programming adapter or device. Your manuals will indicate if this is necessary.
Reviewing your manuals before you begin will highlight any specific tools or steps required for your particular setup and prevent any frustrating mid-programming roadblocks.
With the basics and tools covered, let’s move onto the step-by-step guide to programming your gate remote.
Step-by-Step Guide to Program Your Community Gate Remote
Programming your community gate remote, especially to your car, can seem intricate, but breaking it down into manageable steps simplifies the process significantly. Here’s a comprehensive guide to walk you through it.
Step 1: Identify Your Gate Remote and Car System Type
The first crucial step is to identify the type of gate remote you have and the type of car system you are programming to. There are primarily two types of gate remotes relevant to programming:
- Dip Switch (Fixed Code) Remotes: These older style remotes use a series of tiny switches (dips) inside the remote and receiver. The code is set by the position of these switches.
- Rolling Code Remotes: These modern remotes use a constantly changing code for enhanced security. They are more common in newer community gate systems.
Similarly, your car might have a built-in system like HomeLink® or a similar universal remote system. Identify your car’s make and model and check your car’s manual for details on its built-in remote capabilities.
Identifying these types is critical because the programming method differs significantly between dip switch and rolling code remotes, and also based on your car’s system.
Step 2: Programming Fixed-Code (Dip Switch) Gate Remotes
If your community gate system uses dip switch remotes and you are programming a separate dip switch remote to your car’s system (not directly to the gate receiver), follow these general steps. Note: Directly programming a dip switch community gate remote to your car’s built-in system might not always be feasible or recommended for security reasons in a community setting. Consult your community management for guidance. However, if permitted, or if you are using a personal dip switch gate remote for your property and want to program it to your car:
- Access Dip Switches on Your Car’s System: Refer to your car’s manual to locate the programming buttons or access to the dip switch setting area for your car’s built-in remote system (if applicable and if it uses dip switches – less common in cars).
- Access Dip Switches on Your Gate Remote: Open your gate remote (usually the battery compartment) to locate the dip switches.
- Match Dip Switch Positions: Set the dip switches in your car’s system to match the exact positions (up/down) of the dip switches in your working gate remote.
- Test: Test the programmed button in your car to see if it activates your gate.
Important Note: For community gates, directly cloning dip switch settings to a car system might bypass security protocols. Always prioritize community security guidelines and consult with community management before attempting this. It’s often more secure and recommended to use rolling code systems for community access and car integration.
Step 3: Programming Rolling Code Gate Remotes to Your Car (Two-Step Process)
Programming rolling code remotes to your car’s HomeLink® or similar system is a two-step process due to the enhanced security of rolling codes. This is the more common and secure method for community gate integration.
-
Car Programming Mode:
- Consult your car’s manual to understand how to initiate the programming mode for your car’s built-in remote system (HomeLink® or similar). This usually involves pressing and holding one or two buttons until an indicator light blinks or changes. You might need to clear existing codes first – the manual will guide you.
- Once in programming mode, press and hold the button in your car you wish to program, and simultaneously press and hold the transmit button on your working gate remote close to your car’s receiver (usually the rearview mirror area or visor, check your car’s manual). Hold both buttons until the indicator light in your car blinks rapidly or becomes solid, indicating the car has learned the frequency. However, this is only the first step for rolling codes.
-
Gate Receiver Synchronization (Learning):
- Locate the receiver unit for your community gate. This is usually in a box near the gate operator. Look for a “Learn” or “Program” button on the receiver unit.
- Press and release the “Learn” or “Program” button on the gate receiver. An LED indicator light on the receiver should turn on, indicating it’s in learning mode (usually for a short period, like 30 seconds).
- Immediately return to your car and press and hold the programmed button in your car (the one you programmed in step 1) for a few seconds, then release. You might need to repeat this press-and-hold process a couple of times (check your gate receiver manual) until the gate activates. This step synchronizes the rolling code between your car and the gate receiver.
-
Test: Test the programmed button in your car to ensure it now reliably opens and closes your community gate.
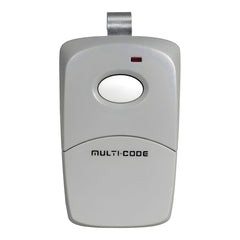
Alt text: Multicode 3089 dip switch gate remote, example of a fixed code remote.
Alt text: Linear DT1 dip switch gate remote, another example of a fixed code remote.
Alt text: LiftMaster 892LT rolling code gate remote, example of a modern secure remote.
Alt text: Hand holding an EG642 rolling code gate remote, demonstrating typical remote size and usage.
Step 4: Troubleshooting Common Programming Issues
Encountering issues during programming is not uncommon. Here’s a quick troubleshooting guide:
- Remote Not Syncing: Ensure you are within range of both your car’s receiver and the gate receiver during programming steps. Double-check battery strength in your remote.
- LED Light Not Blinking/Responding: Refer to your manuals to ensure you are correctly initiating programming mode on both your car and the gate receiver. Try fresh batteries.
- Gate Not Responding After Programming: Double-check that you have followed the correct procedure for your remote and car system type (dip switch vs. rolling code). Repeat the steps carefully. Ensure the gate receiver is in “learn” mode when you are synchronizing from your car.
- Car System Not Learning: Some car systems might have memory limits or require a reset before programming new devices. Consult your car’s manual for troubleshooting steps specific to your car’s remote system.
- Community Gate Access Restrictions: If you are still facing issues with a community gate, there might be access restrictions or specific procedures set by your community management. Contact them for assistance and to ensure you are authorized to program your remote to your car.
If persistent issues arise, re-read your manuals carefully, and consider seeking assistance from a professional gate technician or your car dealership’s service department.
Benefits of Integrating Your Gate Remote with Your Car
The advantages of programming your gate remote to your car extend beyond mere convenience.
- Reduced Clutter: Eliminate the need for multiple remotes cluttering your visor or console. A single integrated button in your car simplifies your driving experience.
- Enhanced Security (Compared to Separate Remotes): Having the gate control integrated into your car can be slightly more secure than a separate, potentially losable remote.
- Increased Convenience and Safety: Operate your gate without taking your hands off the wheel or searching for a remote, enhancing safety and convenience, especially in less-than-ideal weather conditions.
- Improved Vehicle Resale Value (Potentially): For cars with built-in systems like HomeLink®, programmed gate access can be seen as a small value-add feature.
Compatibility Check: Car and Gate Remote Systems
Before attempting to program, ensure compatibility. Most modern cars with built-in systems like HomeLink® are designed to be compatible with a wide range of rolling code gate and garage door openers. However, older systems or less common gate systems might have compatibility limitations.
- Car Manual: Your car’s manual is the primary resource for compatibility information regarding its built-in remote system.
- Gate System Manual: Check the documentation for your community gate system or remote for compatibility specifications.
- Online Compatibility Checkers: HomeLink® and similar systems often have online compatibility tools where you can input your car’s make/model and gate/garage door opener brand to check for compatibility.
- Professional Consultation: If unsure, consult a professional gate technician or your car dealership to confirm compatibility before proceeding.
Maintaining Your Programmed Gate Remote System
Once programmed, maintaining your integrated gate remote system is straightforward:
- Regular Testing: Periodically test the programmed button in your car to ensure it continues to operate the gate reliably.
- Battery Maintenance (for Original Remote): While you are now using your car’s system, keep the battery in your original gate remote fresh. This remote might still be needed for troubleshooting or reprogramming if your car’s system requires it.
- System Updates (Car): Keep your car’s software and systems updated as recommended by the manufacturer. Software updates could occasionally affect the car’s built-in remote system, although this is rare.
- Community Gate System Changes: Be aware of any changes or updates to your community gate system. If the community upgrades or changes systems, you may need to reprogram your car’s remote. Community management will usually provide residents with information about such changes.
Conclusion: Seamless Community Access at Your Fingertips
Programming your community gate remote to your car is a worthwhile endeavor that significantly enhances convenience and streamlines your daily life. By following this comprehensive guide and understanding the nuances of different remote and car systems, you can achieve seamless, keyless entry to your community. Enjoy the ease and security of opening your gate with a simple press of a button, right from the comfort of your car. Remember to always prioritize security and consult with your community management or professionals if you encounter any difficulties or have questions regarding your community gate system.
For a wide selection of gate remotes and accessories, visit: https://elitegates.net/collections/remote-controls