Imagine the convenience of simply pressing a button in your car and watching your gate smoothly open as you arrive home. No more fumbling for a separate remote or struggling to reach the gate opener in the rain. Programming your car remote to control your gate is not only a fantastic convenience but also enhances your home’s security and streamlines your daily routine.
This comprehensive guide will walk you through the process of programming your car’s built-in remote system to operate your gate. We’ll cover everything from understanding the basics of gate remote programming to detailed, step-by-step instructions for different types of remotes and car systems. Whether you have a dip-switch remote or a rolling code remote, and regardless of your car model, you’ll find the information you need to seamlessly integrate your gate control into your vehicle.
Understanding the Fundamentals of Gate Remote Programming
Before diving into the programming steps, it’s crucial to grasp the basic principles of how gate remotes and receivers communicate. This understanding will make the programming process much clearer and easier to troubleshoot if you encounter any issues.
At its core, gate remote programming is about establishing a communication link between your handheld remote (transmitter) and your gate’s receiver unit. This receiver, typically a small box located near your gate motor, is designed to recognize and respond to signals from your remote. When you press a button on your remote, it sends a radio frequency signal containing a specific code. The receiver, if programmed to recognize that code, will then activate the gate motor to open or close.
Think of it like a coded language: your remote speaks a certain “language” (the code), and the receiver needs to be “taught” to understand that language. Programming is the process of teaching the receiver to recognize the code transmitted by your car’s remote system.
Why is Gate Remote Programming Important?
Programming your gate remote offers several significant advantages:
- Enhanced Security: By programming your own remote, you ensure that only authorized devices can operate your gate. Modern systems often use unique, changing codes (rolling codes) to prevent unauthorized access and enhance security.
- Convenience and Ease of Use: Having your gate remote integrated into your car eliminates the need for extra devices. It’s always there when you need it, making entry and exit smoother and more convenient, especially in inclement weather.
- Customization and Control: Programming allows you to personalize your gate operation. You can often program multiple remotes, set temporary access codes (on some systems), and manage who has access to your property.
- Streamlined Daily Routine: Imagine arriving home and opening your gate without taking your hands off the steering wheel or searching for a separate remote. This integration simplifies your daily routine and adds a touch of modern convenience to your home access system.
Essential Tools for Programming Your Gate Remote
Before you begin, gather the necessary tools to ensure a smooth and efficient programming experience. While the specific tools may vary slightly depending on your gate and car models, the following are generally required:
- Your Gate Remote and Car: Obviously, you’ll need both the gate remote you intend to program and your car with its built-in remote system. Ensure both are in good working order with fresh batteries in the gate remote if it’s a separate handheld device.
- User Manuals: Crucially important! Locate the user manuals for both your gate opener and your car’s remote system. These manuals contain specific instructions for your models and are your best resource for accurate programming steps.
- Screwdriver (Possibly): Depending on your gate receiver unit, you might need a screwdriver (usually Phillips head) to access the programming buttons or dip switches.
- Ladder (Potentially): If your gate receiver unit is mounted high or is part of a garage door opener system, a ladder might be necessary to safely reach it.
- New Batteries (If Applicable): If your handheld gate remote is older, having new batteries on hand is a good idea to avoid interruptions during the programming process.
Having these tools prepared will save you time and frustration. Always prioritize safety when using tools and accessing your gate receiver unit.
Step-by-Step Guide to Program Your Gate Remote to Your Car
Now, let’s move into the practical steps of programming your gate remote to your car. The process will differ slightly depending on whether you are working with a dip-switch remote or a rolling code remote. We’ll cover both scenarios in detail.
1. Identifying Your Gate Remote Type
The first crucial step is to determine the type of gate remote you have. This will dictate the programming method you need to follow. The two main types are:
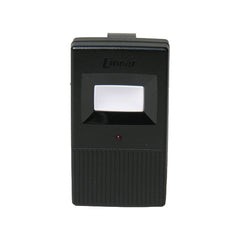
- Dip-Switch Remotes (Fixed Code): These older style remotes use a series of tiny switches (dip switches) inside the remote and receiver. The code is set by the position of these switches (up or down).
- Rolling Code Remotes (Security+ or similar): Modern remotes use rolling code technology for enhanced security. These remotes change the code each time they are used, making them much harder to duplicate or hack. They typically use a “Learn” or “Program” button on the receiver unit for programming.
How to Identify Your Remote Type:
- Check the Physical Remote:
- Dip Switches: Look for a small compartment on your remote, usually behind the battery cover, that houses a series of tiny switches.
- “Learn” Button: Rolling code remotes often don’t have dip switches. Instead, they rely on a “Learn” or “Program” button located on the receiver unit and sometimes on the remote itself.
- Consult Your Manuals: The user manuals for your gate opener and remote should clearly indicate the type of remote system used.
- Visual Identification: Dip switch remotes often look simpler and older, while rolling code remotes tend to have a more modern design and fewer physical controls.
Once you’ve identified your remote type, proceed to the relevant programming instructions below.
2. Programming Dip-Switch (Fixed Code) Gate Remotes to Your Car
Dip-switch remotes are programmed by matching the switch positions on the remote to the switch positions on the receiver. To program a dip-switch remote to your car’s built-in system, you’ll essentially be “cloning” the code from your existing remote to your car.
Steps:
- Access Your Existing Gate Remote: Open your existing dip-switch gate remote to expose the dip switches. Note the current configuration of the switches (up or down). You might want to take a picture for reference.
- Access Your Car’s Programming Mode: Consult your car’s user manual for instructions on how to enter the car’s remote programming mode. This usually involves a sequence of pressing and holding specific buttons in your car (often Homelink buttons if your car is equipped with Homelink). You may need to clear any existing codes first, as described in your car’s manual.
- Simultaneous Transmission: Position your existing gate remote close to the button in your car you wish to program (usually one of the Homelink buttons or a designated button for garage/gate openers).
- Transmit the Code: Press and hold the button on your existing gate remote that opens your gate. At the same time, press and hold the button in your car that you are programming.
- Wait for Synchronization: Keep both buttons pressed until your car indicates that it has learned the code. This indication varies by car model but often involves a blinking light, a beep, or a message on the dashboard. Refer to your car’s manual for the specific signal.
- Test: After the car indicates successful programming, release both buttons and test the programmed button in your car to see if it opens your gate.
Important Notes for Dip-Switch Remotes:
- Proximity: Ensure your existing remote is very close to the car’s button during the programming process for a strong signal transmission.
- Car Manual is Key: Car programming methods vary greatly. Your car’s manual is essential for accurate instructions on entering programming mode and recognizing successful programming.
3. Programming Rolling Code Gate Remotes to Your Car (2-Step Process)
Rolling code remotes require a two-step programming process because of their advanced security features. You first program your car to recognize the type of rolling code system, and then you synchronize it with your specific gate receiver.
Steps:
Step 1: Car to Remote Synchronization
- Car Programming Mode: Enter your car’s remote programming mode as described in your car’s user manual. This often involves pressing and holding one or two Homelink buttons until a light begins to blink slowly.
- Transmit from Existing Remote: Hold your existing rolling code gate remote close to the car button you want to program. Press and hold the button on your existing remote that opens your gate. Simultaneously, press and hold the car button you are programming.
- Wait for Car to Learn (Initial Stage): Continue holding both buttons until your car indicates it has learned the initial signal. This might be a change in the blinking light pattern (e.g., from slow to rapid blinking). Release both buttons when you see this indication.
Step 2: Car to Gate Receiver Synchronization (“Learning” the Code)
- Locate the “Learn” Button on Your Gate Receiver: Go to your gate receiver unit (the box near your gate motor). Look for a button labeled “Learn,” “Program,” or something similar. The location of this button varies depending on the receiver model; it might be on the exterior of the box or under a cover.
- Press the “Learn” Button: Press and release the “Learn” button on your gate receiver. Usually, an LED light near the button will illuminate, indicating that the receiver is in learning mode. You typically have a short window of time (e.g., 30 seconds) after pressing the “Learn” button to complete the next step.
- Transmit from Car (Final Synchronization): Immediately return to your car and press and hold the car button you programmed in Step 1 (the one you synchronized with your handheld remote). Hold the button until your gate receiver acknowledges the signal. This acknowledgment might be indicated by the gate motor clicking, the gate light flashing, or the LED light on the receiver turning off or blinking.
- Test: After the receiver acknowledgment, release the car button and test the programmed button in your car to see if it now opens your gate.
Important Notes for Rolling Code Remotes:
- Time Sensitivity: The “Learn” button on the receiver usually activates a time-sensitive learning mode. You need to press the car button within the specified timeframe after pressing the “Learn” button on the receiver (usually within 30 seconds).
- Receiver Location: Familiarize yourself with the location of the “Learn” button on your gate receiver before you start the programming process to ensure you can access it quickly.
- Two-Step Process is Essential: Don’t skip Step 1. Rolling code systems require both the car to learn the type of rolling code and then synchronize with the specific code from your gate receiver.
Troubleshooting Common Programming Issues
Even with careful following of instructions, you might encounter some issues during the programming process. Here are some common problems and troubleshooting tips:
- Remote Not Syncing:
- Battery Issues: Ensure both your handheld remote (if used in the process) and your car have fresh batteries.
- Proximity: Make sure your remotes are close enough to each other and to the receiver during programming.
- Incorrect Procedure: Double-check that you are following the exact programming steps for your remote type and car model from the user manuals.
- Signal Interference: Other electronic devices or radio interference might disrupt the signal. Try programming in a location away from potential interference sources.
- LED Light Not Blinking/Responding:
- Receiver Power: Verify that your gate receiver unit is powered on and functioning correctly.
- Button Malfunction: Ensure the buttons on your remotes and car are working properly.
- Receiver Issue: If the receiver is not responding at all, there might be a problem with the receiver unit itself, requiring professional inspection.
- Gate Not Responding After Programming:
- Incorrect Code: Double-check that you have correctly followed all programming steps and that the codes are properly synchronized.
- Range Issues: Test the programmed car button from within a close range of the gate to rule out range problems.
- Gate Motor Problems: If the gate still doesn’t respond, there might be an issue with the gate motor or gate mechanism itself, unrelated to the remote programming.
- Car Not Entering Programming Mode:
- Correct Button Sequence: Carefully review your car’s manual for the exact button sequence and timing required to enter programming mode.
- Previous Codes: You might need to clear previously programmed codes in your car before adding new ones. Refer to your car’s manual for instructions on clearing codes.
If you continue to experience difficulties, consult the troubleshooting sections of your gate opener and car manuals. For more complex issues, consider contacting a professional gate technician or your car dealership’s service department for assistance.
Maintaining Your Programmed Car Gate Remote
Once you’ve successfully programmed your car remote to your gate, proper maintenance will ensure its continued reliable operation.
- Regular Battery Checks: For any handheld gate remotes used in the programming process, periodically check and replace the batteries as needed. Weak batteries can lead to reduced range and unreliable operation.
- Keep Clean and Dry: Protect your remotes (both handheld and in-car systems) from moisture, dust, and extreme temperatures. Clean them gently with a soft, dry cloth if necessary.
- Periodic Testing: Regularly test your programmed car button to ensure it’s still working correctly. This is especially important if you don’t use it frequently.
- Re-programming if Necessary: If you experience any issues with your gate remote’s performance, or if you change cars, you may need to re-program the system following the steps outlined in this guide.
Conclusion
Programming your car remote to open your gate is a rewarding task that significantly enhances your daily convenience and home security. By understanding the basics of gate remote systems, identifying your remote type, and carefully following the step-by-step instructions, you can seamlessly integrate your gate control into your vehicle.
Enjoy the ease and security of opening your gate with the touch of a button from the comfort of your car! And remember, always consult your user manuals for the most accurate and model-specific instructions for your gate opener and vehicle.