Controlling your gate from the comfort of your car is a convenience many homeowners appreciate. Programming your car gate opener not only adds ease to your daily routine but also enhances the security of your property. This guide will walk you through the process of programming your gate remote and integrating it with your car, ensuring seamless access control.
Understanding Gate Remote Programming Basics
Before diving into the programming steps, it’s crucial to understand the fundamentals of how gate remote programming works. Essentially, you are teaching your remote to communicate with your gate’s receiver unit. This receiver, installed near your gate, is the device that interprets signals from your remote and activates the gate motor to open or close.
The programming process involves setting up a secure communication channel between your handheld remote and the receiver. This ensures that only authorized remotes can operate your gate, enhancing your property’s security.
Why is Programming Your Gate Remote Important?
Proper gate remote programming is vital for several reasons:
- Enhanced Security: Programming allows you to set unique codes, preventing unauthorized access to your property. Only remotes programmed with the correct code will be able to operate the gate.
- Convenience and Control: A programmed remote provides convenient, remote access to your property, streamlining your daily routine, especially during inclement weather.
- Customization: Many gate remotes offer advanced features like setting opening and closing delays or implementing time-based access restrictions. Programming unlocks these features, allowing you to tailor your gate operation to your specific needs.
- Flexibility: As your needs evolve, you might need to add or remove remotes. Understanding the programming process gives you the flexibility to manage your gate access efficiently.
Now that we understand the importance, let’s explore the tools you’ll need to get started with programming your gate remote.
Essential Tools for Gate Remote Programming
To ensure a smooth and successful gate remote programming experience, gather these essential tools beforehand:
- Screwdriver: You might need a screwdriver to access the receiver unit or the battery compartment of your remote.
- Ladder (if needed): For some gate setups, especially garage door openers, you might need a ladder to reach the receiver unit.
- New Batteries (if applicable): If your remote is older or has weak batteries, having new batteries on hand is crucial to avoid interruptions during programming.
- User Manual: The user manual for your gate remote and gate opener is the most important tool. It contains specific instructions for your model and troubleshooting tips.
It’s always recommended to thoroughly read your user manual before starting. Some gate remotes might require specific programming adapters or devices, and the manual will provide detailed information on any additional requirements.
With your tools ready and a clear understanding of the basics, you’re now prepared to begin programming your gate remote. Let’s move on to the step-by-step guides for different types of remotes.
Step-by-Step Guide to Program Your Gate Remote
Programming your gate remote might seem complex, but by following a structured approach, it becomes a manageable task. Let’s break down the process into clear, easy-to-follow steps.
Step 1: Identifying Your Gate Remote Model
The first crucial step is to identify your specific gate remote model. Programming methods vary between models, so knowing your model number is essential for finding the correct instructions.
- Check the Remote: Look for a model number or manufacturer name printed on the remote itself, often on the back or inside the battery compartment.
- Consult the User Manual: Your gate or gate opener user manual should contain information about the compatible remotes and their model numbers.
- Manufacturer’s Website: If you can identify the manufacturer, their website is a valuable resource for finding your remote model and programming instructions.
- Contact Support: If you are unsure, contacting the manufacturer’s customer support or a gate service professional can help you identify your model.
Once you have identified your gate remote model, you can proceed with the appropriate programming method.
Step 2: Programming Fixed-Code Gate Remotes (Dip Switch Remotes)
Fixed-code remotes, often referred to as dip switch remotes, are an older type of remote where the code is set by physical switches. Here’s how to program them:
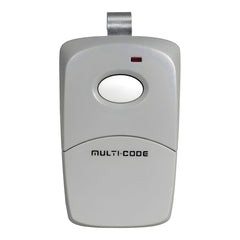
If you have a dip switch remote, like models from Multicode and Linear, follow these steps:
- Locate the Receiver Unit: Find the receiver unit of your gate opener. It’s usually a small box near the gate or inside the opener housing, possibly with an antenna.
- Access Dip Switches on Receiver: Open the receiver unit to locate the dip switches. These are small switches, often numbered, that can be in the “up” or “down” position.
- Access Dip Switches on Remote: Open your remote to find its dip switches. They are usually located in the battery compartment.
- Match Dip Switch Positions: Set the dip switches on your remote to match the exact positions of the dip switches on the receiver.
- Change the Code (Optional): If you want to change the access code, alter the dip switch positions on both the receiver and the remote to a new, matching configuration.
- Test: Close the remote and receiver units. Test the remote by pressing the button while within range of the gate.
Step 3: Programming Rolling Code Gate Remotes
Rolling code remotes are more modern and secure. They use a constantly changing code to prevent code theft. Programming them involves a “learn” button on the receiver.
For rolling code remotes, including models from LiftMaster and Elite Gate, follow these general steps:
- Locate the Receiver Unit: Find the receiver unit near your gate opener.
- Find the “Program” or “Learn” Button: Look for a button labeled “Program,” “Learn,” or similar on the receiver unit.
- Press the Program Button: Press and release the “Program” button on the receiver. An LED indicator light will usually turn on, indicating it’s in programming mode.
- Press Remote Button: Immediately press and hold the desired button on your gate remote.
- Wait for Confirmation: The receiver LED might blink or turn off, or the gate might click, indicating successful programming. Check your user manual for specific confirmation signals.
- Test: Test the programmed remote button by pressing it while within range of the gate.
Integrating Your Gate Remote with Your Car’s Homelink System
Many modern cars come equipped with built-in universal remote systems like Homelink, which can be programmed to operate your gate. Here’s how to integrate your gate remote with your car:
- Consult Your Vehicle’s Manual: Refer to your car’s owner’s manual for specific instructions on programming the built-in remote system.
- Enter Programming Mode in Car: Typically, this involves pressing and holding one or two buttons in your car until an indicator light begins to flash differently, signaling programming mode. Some systems might require clearing existing codes first by pressing and holding the outer two buttons for an extended period (around a minute).
Programming a Dip Switch Remote to Your Car
- Ensure Remote is Working: Verify that your dip switch remote is functioning correctly and has fresh batteries.
- Position Remote and Car Button: Hold your working remote close to the button in your car you wish to program.
- Press and Hold Both Buttons: Simultaneously press and hold the button on your handheld remote and the chosen button in your car until the car’s indicator light changes, indicating successful programming.
- Test: Test the programmed car button to operate your gate.
Programming a Rolling Code Remote to Your Car (Two-Step Process)
Programming rolling code remotes to a car often requires a two-step “learning” process:
- Initial Car Programming: Follow steps 1-3 from the “Programming a Dip Switch Remote to Your Car” section to initially program your car using your working remote.
- Receiver “Learning” Step: Go to your gate opener receiver unit and press the “Program” or “Learn” button (as you would when programming a new remote directly to the gate).
- Final Car Programming: Return to your car and press and hold the car button you just programmed until the car’s indicator light confirms programming completion. This step allows the car to learn the rolling code from the receiver.
- Test: Test the programmed car button to ensure it now operates your gate.
Troubleshooting Common Gate Remote Programming Issues
If you encounter problems during programming, here are some common issues and troubleshooting tips:
- Remote Not Syncing: Ensure you are following the correct programming steps for your specific remote and receiver models. Double-check battery strength and orientation.
- LED Light Not Blinking: If the LED light on the receiver or remote isn’t behaving as expected, refer to the user manual for troubleshooting. It might indicate a power issue or incorrect procedure.
- Gate Not Responding: After programming, if the gate doesn’t respond, re-verify all steps, check for obstructions in the gate’s path, and ensure the receiver unit is powered correctly.
- Factory Reset: If troubleshooting fails, some remotes and receivers have a factory reset procedure (usually detailed in the user manual) that can help you start the programming process fresh.
Always re-read your user manuals carefully, as they are the best resource for model-specific troubleshooting advice.
Benefits of Integrating Your Gate Remote with Your Car
Integrating your gate remote with your car’s built-in system offers significant advantages:
- Single Remote Convenience: Eliminate the need for multiple remotes. Control both your car and gate with integrated buttons in your vehicle.
- Always Accessible: Your gate opener control is always within reach, conveniently located in your car.
- Clean Dashboard: Reduce clutter by removing the need for a separate gate remote hanging from your visor or in your console.
- Increased Security (potentially): Integrated systems can sometimes offer enhanced security features compared to carrying a separate remote.
Compatibility Check: Car and Gate Remote
Before attempting to integrate your gate remote with your car, ensure compatibility:
- Car’s Manual: Check your car’s user manual for information on its built-in remote system and compatibility with gate openers.
- Homelink Website: If your car has Homelink, the Homelink website (www.homelink.com) has compatibility information and programming guides.
- Gate Opener Compatibility List: Some gate opener manufacturers provide compatibility lists for their receivers and car systems.
- Professional Consultation: If unsure, consult a car audio specialist or a gate installation professional to verify compatibility and get assistance.
Maintaining Your Programmed Gate Remote System
Once you have successfully programmed your gate remote and integrated it with your car, proper maintenance ensures long-term reliability.
Regular Check-ups for Your Gate Remote
- Battery Checks: Regularly check your remote batteries. Replace them proactively, especially if you notice reduced range or responsiveness.
- Physical Inspection: Inspect the remote for physical damage, cracked cases, or button wear.
- Clean the Remote: Keep your remote clean and free from dirt and debris that can interfere with button operation.
Dealing with Battery Issues
- Recognize Symptoms: Decreased range or intermittent operation are often signs of low batteries.
- Replace Promptly: Replace batteries as soon as you suspect they are weakening. Use the correct battery type specified in your user manual.
- Proper Disposal: Dispose of old batteries responsibly according to local regulations.
Conclusion
Programming your car gate opener is a valuable skill that brings convenience and enhanced security to your property access. By following this comprehensive guide, understanding your remote type, and carefully executing the programming steps, you can seamlessly integrate your gate control into your car. Remember to consult your user manuals for specific model instructions and enjoy the ease of controlling your gate with the push of a button from your vehicle!
For a wide selection of gate remotes and accessories, visit: https://elitegates.net/collections/remote-controls