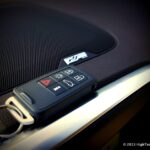
Have you ever found yourself locked out of your car in the cold, or wished you could start your engine to warm it up before stepping inside? A universal car starter remote can be a game-changer, offering convenience and comfort. But what happens when you need to program a new remote or reprogram an existing one? This guide will walk you through the general steps to program your universal car starter remote, ensuring you can regain control and comfort with ease.
Understanding Your Remote Starter System
Before diving into the programming process, it’s helpful to understand the type of remote starter system you have. Generally, car starter systems fall into two main categories: factory-installed and aftermarket. Factory systems are installed by the vehicle manufacturer and are often integrated with the car’s security system. Aftermarket systems are installed after the car is manufactured and can range from basic to advanced features. While the specific programming steps can vary depending on the brand and model of your system, the underlying principles are often similar.
Step-by-Step Guide to Programming Your Universal Car Starter Remote
The following steps outline a common procedure for programming a universal car starter remote. It’s crucial to consult your specific remote starter system’s manual for the most accurate and detailed instructions. This guide is intended to provide a general understanding and starting point.
Preparation
- Disarm your security system: Ensure your car’s security system is disarmed. If the alarm is active during programming, it can interfere with the process.
- Turn the ignition off: Make sure your vehicle’s ignition is completely off. The key should not be in the ignition, or if it is, it should be in the “off” position.
- Open the driver’s door: In many systems, opening the driver’s door is a necessary step to initiate the programming sequence.
Entering Programming Mode
- Turn vehicle ignition on: Turn your vehicle’s ignition to the “on” position. This is typically the position right before you would start the engine. Do not start the engine.
- Locate and press the programming/override button: The programming or override button is often located under the instrument panel, typically near the steering column. You may need to consult your system’s manual to pinpoint its exact location.
- Press and hold the button: Press and hold the programming/override button.
- Wait for confirmation: After holding the button for a specific period (often around 15 seconds, but check your manual), you should receive confirmation that the system has entered programming mode. This confirmation can be in the form of horn chirps, flashing lights, or a specific sound from the system. For instance, you might hear three horn chirps as mentioned in the original article for some Ford systems.
- Release the programming/override button: Once you receive the confirmation signal, release the programming/override button.
Programming the Remote
- Press a button on the remote: Take the remote control you wish to program and press any button on it.
- Listen for confirmation: The system should provide another confirmation signal to indicate that it has successfully “learned” the remote control’s signal. This could be a single horn chirp or another distinct sound.
- Repeat for additional remotes: If you have multiple remotes to program, repeat step 1 and 2 for each additional remote within the programming mode timeframe.
Exiting Programming Mode and Testing
- Turn the vehicle ignition off: Turn your vehicle’s ignition completely off to exit the programming mode.
- Test all remote controls: Thoroughly test all the remotes you have programmed to ensure they are working correctly. Try starting your car, locking and unlocking doors (if your remote supports these functions), and any other features your remote is supposed to control.
Troubleshooting Common Issues
If you encounter difficulties programming your remote, consider these common troubleshooting steps:
- Check the remote battery: A dead or weak battery is a frequent culprit. Replace the battery in your remote with a fresh one and try the programming procedure again.
- Remote compatibility: Ensure the remote you are trying to program is compatible with your car starter system. Universal remotes are designed to work with a range of systems, but it’s always best to double-check compatibility, especially if you are using an aftermarket remote.
- Repeat the procedure: Sometimes, the programming process might not take on the first attempt. Carefully repeat all the steps, ensuring you are following each instruction precisely.
- Consult your manuals: Your vehicle owner’s manual and your remote starter system’s manual are invaluable resources. They contain specific instructions and troubleshooting tips tailored to your system.
- Seek professional help: If you are still unable to program your remote after trying these steps, it might be best to consult a professional car audio installer or a qualified mechanic. They have the expertise and tools to diagnose and resolve more complex programming issues.
Programming your universal car starter remote can often be a straightforward process. By following these steps and consulting your system’s documentation, you can likely regain control of your remote starter and enjoy the convenience it provides.
