Integrating DVD movie playback into your JVC car radio system can significantly enhance your in-car entertainment, especially on long journeys. Whether you’re looking to entertain passengers or simply enjoy your favorite films on the go, setting up your JVC car radio to play DVDs is a process that can be accomplished with the right steps and equipment. This guide will walk you through the process of programming your JVC car radio to play movie DVDs, ensuring a smooth and enjoyable viewing experience.
Understanding Compatibility and Necessary Equipment
Before diving into the programming, it’s crucial to understand if your JVC car radio model supports DVD playback and what additional equipment you might need.
Checking Your JVC Car Radio Specifications
Not all JVC car radios are equipped to play DVDs. The first step is to check the specifications of your specific JVC car radio model. You can usually find this information in the user manual that came with your unit or on the JVC website by searching for your model number. Look for keywords like “DVD playback,” “video playback,” or “multimedia playback.” If your car radio is not DVD compatible, it might be necessary to consider an external DVD player or upgrading to a DVD-compatible JVC car radio model.
Essential Equipment for DVD Playback
Assuming your JVC car radio is DVD compatible, you will likely need the following equipment:
- DVD Player: If your JVC car radio doesn’t have a built-in DVD player, you’ll need an external car DVD player. Ensure it’s compatible with your car’s electrical system (usually 12V DC).
- RCA Cables: These audio/video cables are typically used to connect a DVD player to your car radio. You’ll need video RCA cables (usually yellow) and audio RCA cables (red and white for stereo sound).
- Power Adapter for DVD Player (if external): If you’re using an external DVD player, it will need a power source. This is usually a cigarette lighter adapter or direct wiring to your car’s power supply.
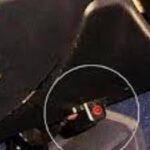
- Parking Brake Bypass (Potentially): For safety reasons, many car radios are designed to only play video when the parking brake is engaged. A parking brake bypass module can override this, allowing video playback while driving (though this should be used responsibly and in accordance with local laws, prioritizing driver safety).
Step-by-Step Guide to Programming Your JVC Car Radio for DVD Playback
Once you’ve confirmed compatibility and gathered the necessary equipment, follow these steps to program your JVC car radio for DVD playback:
1. Connecting the DVD Player to Your JVC Car Radio
This is the most crucial physical step.
- Locate the Input Ports on Your JVC Car Radio: Look for RCA input ports on the back of your JVC car radio unit. These are usually labeled “Video IN,” “Aux Video,” or similar. Consult your car radio’s manual for the exact location and labeling. You’ll also need to locate the corresponding audio input ports, usually labeled “Audio IN” or “Aux Audio” (red and white).
- Connect RCA Cables: Connect the yellow RCA cable from the “Video OUT” of your DVD player to the “Video IN” of your JVC car radio. Similarly, connect the red and white RCA cables from the “Audio OUT” of your DVD player to the “Audio IN” of your car radio. Ensure a secure connection for optimal signal transmission.
- Power Up the DVD Player: Connect the DVD player to a power source in your car using the appropriate power adapter. Turn on the DVD player to ensure it’s functioning.
2. Setting the Input Source on Your JVC Car Radio
After physically connecting the DVD player, you need to select the correct input source on your JVC car radio to receive the DVD player’s signal.
- Access the Source Menu: Turn on your JVC car radio. Navigate to the “Source” or “Input” menu. This is usually accessible via a physical button labeled “Source,” “SRC,” or through the main menu on the touchscreen display (if applicable).
- Select the Correct Input: Scroll through the available input sources until you find the input you connected the DVD player to. This might be labeled “AUX,” “Video,” “AV IN,” or a similar designation depending on your JVC model. Select this input source.
- Test the Connection: Insert a DVD into your DVD player and press play. If the connection is successful and the correct input is selected, you should now see the DVD video on your JVC car radio screen and hear the audio through your car speakers.
3. Adjusting Display and Audio Settings (Optional)
Once you have DVD playback working, you might want to adjust display and audio settings for an optimal viewing experience.
- Display Settings: Navigate to the “Display” or “Video” settings menu in your JVC car radio. Here, you might be able to adjust brightness, contrast, color, and other display parameters to suit your preferences and viewing conditions.
- Audio Settings: Explore the “Audio” or “Sound” settings menu. You can fine-tune the audio output, adjust equalizer settings, balance, fader, and potentially select surround sound modes if your system supports it. These adjustments can enhance the audio quality of your DVD movies in your car.
4. Troubleshooting Common Issues
If you encounter problems during setup, here are some common issues and troubleshooting tips:
- No Video or Audio:
- Double-check all RCA cable connections to ensure they are firmly plugged into the correct ports on both the DVD player and the JVC car radio.
- Verify that the DVD player is powered on and playing the DVD.
- Ensure you have selected the correct input source on your JVC car radio.
- Test with different RCA cables to rule out cable issues.
- Video but No Audio (or vice versa):
- Check the audio RCA connections specifically (red and white cables).
- Ensure the DVD volume is turned up and not muted.
- Check the audio settings on your JVC car radio to make sure the audio output is correctly configured for the selected input.
- Parking Brake Interlock: If you only get video when the parking brake is engaged, and you want to bypass this (for passenger viewing, where legal and safe), you may need to install a parking brake bypass module. However, always prioritize safety and adhere to local regulations regarding in-car video playback while driving.
Enjoying DVD Movies in Your Car
By following these steps, you should be able to successfully program your JVC car radio to play movie DVDs. This upgrade transforms your car into a mobile entertainment center, perfect for road trips and passenger enjoyment. Remember to always operate your system responsibly and safely, adhering to all traffic laws and prioritizing driver attention on the road. Enjoy your movies!