Car remotes offer convenience and security, allowing you to lock, unlock, and sometimes even start your car from a distance. If you’ve recently replaced your Calsonis Kansel car remote battery, or added a new remote, you might find it no longer communicates with your vehicle. This is because it needs to be programmed to sync with your car’s security system. Don’t worry, programming your Calsonis Kansel car remote is often a straightforward process you can do yourself, saving you a trip to the dealership.
The exact method for programming your remote can vary depending on your car’s make, model, and year. However, many Calsonis Kansel car remotes can be programmed using a simple in-car procedure. Here’s a general guide to get you started:
Step-by-Step Guide to Programming Your Calsonis Kansel Car Remote
-
Get in Your Car and Close All Doors: Ensure all doors, the hood, and the trunk are properly closed. This is crucial for the programming sequence to work correctly.
-
Insert and Turn the Ignition Key: Put your car key into the ignition. Turn the key to the “ON” position (where the dashboard lights up) but do not start the engine. Hold it in this position for a few seconds.
-
Turn the Key Off and Repeat: Turn the ignition key back to the “OFF” position. You may need to repeat the “ON” and “OFF” cycle a specific number of times. This number can vary, often between 5 to 10 times, depending on your vehicle. Listen for a chime or the car locks to cycle, which indicates you’ve entered programming mode.
-
Enter Programming Mode (If Required): Some models require you to press and hold a specific button during the key cycling process to enter programming mode. This could be the lock or unlock button on the remote, or a button inside the car. Consult your car’s owner’s manual for specific instructions for your Calsonis Kansel model.
-
Press a Button on the Remote: Once in programming mode (or after the key cycling), press and hold the “LOCK” or “UNLOCK” button on your Calsonis Kansel car remote for a few seconds. You might hear the car doors lock and unlock again to confirm the signal is received.
-
Test the Remote: After releasing the button, remove the key from the ignition and exit the car. Test all the buttons on your newly programmed Calsonis Kansel remote to ensure they are working correctly – lock, unlock, trunk release, and panic button if applicable.
-
Program Additional Remotes (If Necessary): If you have multiple remotes to program, repeat steps 5 and 6 immediately for each additional remote. Some systems have a time limit for programming multiple remotes.
Troubleshooting Tips
-
Consult Your Owner’s Manual: The most reliable source for programming instructions specific to your Calsonis Kansel car is your vehicle’s owner’s manual. Look for the section on “remote keyless entry” or “key programming.”
-
Check the Battery: Ensure the battery in your Calsonis Kansel remote is new and properly installed. A weak battery can prevent successful programming.
-
Try Different Key Cycles: If the initial key cycling count doesn’t work, try increasing or decreasing the number of cycles slightly.
-
Check for a Valet Switch: Some vehicles have a valet switch that can disable remote programming. Make sure this switch is not engaged.
-
Seek Professional Help: If you’ve tried these steps and still cannot program your Calsonis Kansel remote, it’s best to contact a qualified locksmith or your local car dealership. They have specialized tools and knowledge to diagnose and resolve remote programming issues.
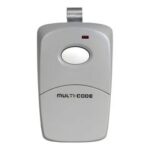
Alt text: Car key and remote fob for keyless entry, illustrating typical components involved in car remote programming.
Programming your Calsonis Kansel car remote can often be done at home with a little patience and the right steps. By following these guidelines and consulting your owner’s manual, you can regain the convenience and security of your remote keyless entry system.