Imagine the convenience of opening your gate without fumbling for a separate remote. Programming your gate remote to your car’s built-in system offers exactly that – seamless access to your property right from your vehicle. This guide will walk you through understanding, programming, and maintaining your gate remote car integration, enhancing both your security and daily convenience.
Understanding Gate Remote Programming Basics
Before diving into the programming process, it’s helpful to understand the fundamentals of how gate remotes operate. At its core, gate remote programming is about establishing a communication link between your handheld remote and your gate’s receiver. This receiver, typically a small unit attached to your gate opener, is designed to interpret signals from your remote, triggering the gate to open or close.
Think of it like this: your remote is a specialized transmitter, and the receiver is a dedicated listener. When you press a button on your remote, it sends a unique code. The receiver, programmed to recognize this code, activates the gate mechanism. This secure wireless communication is what allows you to control your gate from a distance, adding a layer of security and ease to your property access.
Why Program Your Gate Remote? The Benefits
Programming your gate remote is not just about tech savviness; it’s about enhancing your lifestyle and security. Here’s why it’s a worthwhile endeavor:
- Enhanced Convenience: No more searching for a separate remote! Control your gate directly from your car, simplifying your entry and exit, especially in bad weather.
- Improved Security: Programming ensures that only authorized remotes can operate your gate. Modern systems with rolling codes offer even greater security by changing the access code with each use, preventing code theft.
- Streamlined Access: For households with multiple drivers, integrating the gate remote into each car provides easy access for everyone without the need for multiple handheld remotes.
- Customization: Many gate remote systems allow for customization like setting unique codes, delays, and access schedules, offering tailored control over your gate operation.
Essential Tools for Gate Remote Programming
Getting ready to program your gate remote? You’ll likely need just a few common tools to ensure a smooth process. While specific requirements can vary, here’s a general checklist:
- Screwdriver: Often needed to access the receiver unit or battery compartment of your remote. Both Phillips head and flathead screwdrivers can be useful.
- Ladder (Potentially): If your receiver unit is installed at height, a ladder might be necessary to safely reach it. Exercise caution when using ladders.
- Fresh Batteries: If you’re working with an older remote or experiencing issues, new batteries can often resolve connectivity problems. Check your remote’s user manual for the correct battery type.
- User Manuals: Crucially important! Have both your gate remote and your car’s owner manuals handy. These will provide specific instructions for your models.
For some advanced systems or car integrations, you might encounter specific needs outlined in your manuals. Always refer to these guides first for model-specific instructions and any additional tools that might be required. Preparation is key to a hassle-free programming experience.
Step-by-Step Guide: Programming Your Gate Remote
Let’s get into the practical steps of programming your gate remote. The process generally breaks down into identifying your remote type and then following the corresponding programming method.
Step 1: Identify Your Gate Remote Model
The first crucial step is to identify your gate remote model. Programming methods differ significantly between models, so accurate identification is essential.
- Check the Remote Itself: Look for a model number or manufacturer name printed on the remote casing, often on the back or inside the battery compartment.
- Consult the User Manual: If you have the original user manual for your gate remote system, it will contain the model information.
- Manufacturer’s Website: If you know the manufacturer, their website is a valuable resource. Search for your remote visually or by any identifying numbers you find.
- Contact the Installer/Supplier: If you’re still unsure, reach out to the company that installed your gate or supplied the remote. They should be able to identify the model for you.
- Send a Picture for Assistance: Many online retailers specializing in gate remotes, like Elite Gates, offer identification assistance if you send them a picture of your remote.
Once you’ve identified your remote model, you can find the correct programming instructions, typically categorized by remote type: Fixed-Code (Dip Switch) and Rolling Code.
Step 2: Programming Fixed-Code (Dip Switch) Remotes
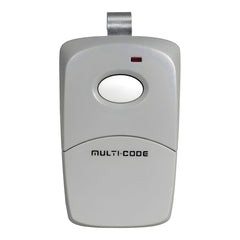
Dip switch remotes, like many older Multicode and Linear models, use a series of tiny switches to set their code. Here’s how to program them:
- Locate the Receiver Unit: Find the receiver box, usually near your gate motor. Look for a small box with an antenna (wire or coax cable).
- Access Dip Switches on Receiver: Open the receiver unit to find the dip switches. They are often behind a small window or accessed by removing a cover.
- Access Dip Switches on Remote: Locate the dip switches on your remote. This is often in the battery compartment.
- Match Dip Switch Positions: Using a small tool (like a pen tip), set the dip switches on your remote to exactly match the pattern of the dip switches in the receiver. Switches are usually in an “up” or “down” position.
- Test: Close up the remote and receiver. Test the programmed remote by pressing the button while within range of the gate.
Optional Code Change: To set a new security code, change the dip switch positions on both the receiver and the remote to a new, matching pattern.
Step 3: Programming Rolling Code Remotes
Rolling code remotes, common in modern systems like LiftMaster, offer enhanced security. Programming typically involves a “Learn” or “Program” button:
- Locate Receiver and “Learn” Button: Find the receiver unit near your gate motor. Look for a button labeled “Learn,” “Program,” or similar.
- Activate Programming Mode: Press the “Learn” button on the receiver. An LED indicator light will usually turn on, indicating programming mode is active (often for a limited time).
- Transmit from Remote: Within 30 seconds of pressing the “Learn” button, press and hold the button on your remote that you wish to program.
- Wait for Confirmation: The receiver’s LED light may blink or turn off to indicate successful programming.
- Test: Test the programmed remote button by pressing it within range of the gate.
Integrating Your Gate Remote with Your Car
Now for the exciting part: programming your gate remote to your car’s HomeLink or similar built-in system. Refer to your vehicle’s owner manual for specific instructions, as steps vary by car manufacturer and model. General steps often include:
- Clear Existing Codes (Potentially): Some car systems require you to erase any previously programmed codes. This is often done by pressing and holding the two outer HomeLink buttons for about a minute until the indicator light flashes rapidly.
- Enter Programming Mode in Car: This usually involves pressing and holding one of the HomeLink buttons you wish to program until the indicator light blinks slowly or differently.
Programming a Dip Switch Remote to Your Car
- Working Remote: Ensure your handheld gate remote is functioning correctly and has fresh batteries.
- Positioning: Hold your handheld remote close to the HomeLink button you are programming in your car’s interior.
- Simultaneous Press: Press and hold the button on your handheld remote and the chosen HomeLink button in your car at the same time.
- Hold Until Programmed: Continue holding both buttons until the HomeLink indicator light changes – it might blink faster or become solid, indicating successful programming.
- Test: Test the programmed HomeLink button to operate your gate.
Programming a Rolling Code Remote to Your Car (Two-Step Process)
Rolling code car integration often requires a two-step “learn” process for security reasons:
- Initial Car Programming (Same as Dip Switch): Follow steps 1-4 from “Programming a Dip Switch Remote to Your Car” to initially program the remote signal into your car’s HomeLink system.
- Activate Receiver’s “Learn” Mode: Go to your gate receiver unit and press the “Learn” or “Program” button, just as you would when programming a new handheld remote. The LED indicator will light up.
- Car “Learn” Transmission: Immediately return to your car (within 30 seconds of pressing the receiver’s “Learn” button) and press and hold the programmed HomeLink button. Hold it until the gate responds or the HomeLink indicator light confirms programming (may blink rapidly or change state).
- Test: Test the programmed HomeLink button to operate your gate.
Troubleshooting Common Programming Issues
Encountering problems? Here are some common troubleshooting tips:
- Range Issues: Ensure you are within the effective range of your gate receiver during programming and testing.
- Battery Check: Weak batteries in your handheld remote can cause programming failures. Replace them with fresh batteries.
- Incorrect Remote Type: Double-check you are using the correct programming method for your specific remote type (dip switch or rolling code).
- Receiver Programming Mode Timeout: Receiver “learn” modes often time out quickly (e.g., 30 seconds). Work promptly once you activate the receiver’s “Learn” button.
- Clear Car Codes: If you’re having trouble programming to your car, try clearing existing HomeLink codes first as described in your car’s manual.
- User Manual Review: Re-read both your gate remote and car manuals carefully. Specific models may have unique steps or requirements.
- Factory Reset (Remote): Some remotes have a factory reset procedure (check the manual) that can help if you’re experiencing persistent issues.
- Professional Help: If you’re still stuck, consider contacting a gate technician or the remote manufacturer’s support for assistance.
Maintaining Your Programmed Gate Remote and Car Link
Once programmed, maintaining your gate remote and car integration is simple:
- Regular Remote Check-ups: Periodically inspect your handheld remote (if applicable) for battery corrosion, damage, and clean it to ensure buttons are free of debris.
- Battery Replacement: Replace batteries in your handheld remote promptly when you notice decreased range or responsiveness.
- Test Car Integration Regularly: Occasionally test your car’s HomeLink gate operation to ensure it’s still working correctly.
- Re-programming if Necessary: If you change cars or experience issues, you may need to repeat the programming process. Keep your manuals handy.
Conclusion
Programming your remote control gate to your car is a fantastic way to enhance convenience and security. By understanding the basics, identifying your remote type, and carefully following the step-by-step instructions, you can seamlessly integrate your gate operation into your vehicle. Enjoy the ease of one-touch gate access and the peace of mind that comes with streamlined security. For a wide selection of compatible remotes, visit Elite Gates Remote Controls. Happy programming and enjoy the added convenience!