Keyless entry remotes, often called key fobs, are incredibly convenient devices that allow you to control your car’s locks, alarm system, and even start the engine remotely. However, these electronic devices can sometimes lose their programming due to battery changes or system glitches. Fortunately, in many cases, you can reprogram your key fob yourself, saving you time and money compared to visiting a dealership or calling an automotive locksmith. This guide will walk you through the general steps on how to program a keyless entry remote for your car.
Before You Begin: Preparation is Key
While many vehicles share similar programming methods, it’s crucial to understand that the exact procedure can vary significantly depending on your car’s make, model, and year. Before you attempt to program your key fob, the most important step is to consult your vehicle’s owner’s manual. This manual is your most reliable source for specific instructions tailored to your car. You can usually find your owner’s manual in your glove compartment or search for a digital version online on the manufacturer’s website.
In addition to your manual, make sure you have the following ready:
- Your Vehicle: You’ll need access to your car, typically sitting in the driver’s seat. Ensure all doors are closed properly.
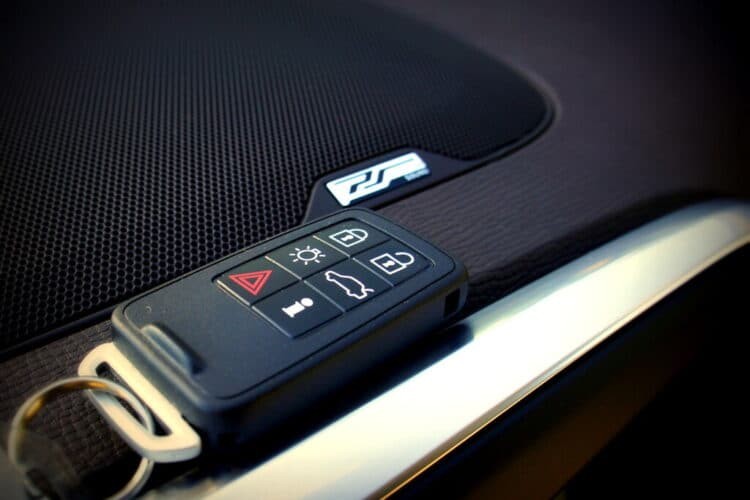
- Your Key Fob(s): Have all the key fobs you want to program ready. Often, when you program one fob, you need to reprogram all of them at the same time.
- Your Ignition Key: You will likely need your physical ignition key to turn the ignition on and off during the programming process.
Safety First: Ensure your car is parked in a safe location, away from traffic, before starting the programming procedure.
Step-by-Step Guide to Programming Your Key Fob
The following steps provide a general outline for programming a keyless entry remote. Always prioritize the specific instructions in your owner’s manual. If the steps below differ from your manual, follow your manual’s instructions.
Step 1: Get in the Driver’s Seat and Prepare Your Keys
Sit comfortably in the driver’s seat and close all doors. Have your ignition key and the key fob you wish to program within easy reach. Ensure the car is turned off before you begin.
Step 2: Initiate Programming Mode
This step is where the procedure can vary the most between car manufacturers. Common methods to enter programming mode include:
- Ignition Cycling: This often involves inserting your ignition key into the ignition and turning it to the “ON” position (without starting the engine) and then back to “OFF” multiple times in quick succession. The number of cycles and the speed may be critical, so refer to your manual.
- Button Press Combinations: Some vehicles require you to press and hold specific buttons on the door panel (like the power lock or unlock buttons) while turning the ignition key.
- Using an Existing Working Fob: In some cases, you might need a previously programmed key fob to initiate the programming sequence for a new fob.
You’ll know you’ve successfully entered programming mode when your car provides some form of indication. This could be:
- A Chime or Beep: The car might emit an audible sound to signal it’s ready for programming.
- Flashing Lights: The parking lights or interior lights might flash.
- A Message on the Dashboard: Some newer vehicles might display a message on the instrument cluster indicating programming mode is active.
If you don’t receive any indication, double-check your owner’s manual and repeat the initiation steps carefully.
Step 3: Press the Lock Button on the Fob
Once your car is in programming mode, take the key fob you want to program and press the “Lock” or “Lock/Unlock” button. You might need to hold the button down for a few seconds. Aim the key fob towards the car’s receiver, which is often located in the rearview mirror area or on the dashboard.
Step 4: Test the Key Fob
After pressing the button, the car should respond to confirm that the fob has been programmed. This confirmation is often the same signal used to indicate entering programming mode (chime, light flash, etc.). Try pressing the buttons on the newly programmed fob to lock and unlock the doors to ensure it’s working correctly.
Step 5: Repeat for Additional Fobs
If you have multiple key fobs to program, repeat steps 3 and 4 immediately for each additional fob. Many car systems will exit programming mode after a short period or after programming only one fob. Therefore, it’s usually necessary to program all your fobs in one session.
Troubleshooting and Tips
- Speed and Timing: Programming sequences often require precise timing. Perform the steps quickly and accurately, as described in your manual.
- Fresh Batteries: Ensure the batteries in your key fob are new and fully charged. Weak batteries can interfere with the programming process.
- Incorrect Procedure: If you are having trouble, carefully re-read your owner’s manual. Small variations in the steps can make a big difference.
- System Glitches: In rare cases, system glitches can prevent programming. Trying the procedure again after a few minutes might resolve temporary issues.
When to Consult a Professional:
If you’ve followed your owner’s manual instructions carefully and are still unable to program your key fob, or if you are uncomfortable performing the procedure yourself, it’s best to consult a qualified automotive locksmith or your car dealership. They have specialized tools and expertise to diagnose and resolve key fob programming issues.
Conclusion
Programming your keyless entry remote can be a straightforward process that saves you the expense of professional services. By carefully following the steps outlined in your vehicle’s owner’s manual and this guide, you can often successfully reprogram your key fob and regain the convenience of remote access to your car. Remember to always prioritize your manual’s instructions and seek professional help if needed.