Integrating your LiftMaster garage door opener with your car’s remote system offers unparalleled convenience, allowing you to effortlessly access your garage with the simple press of a button within your vehicle. No more fumbling for separate remotes – just seamless entry every time you arrive home. This guide will walk you through the straightforward process of programming your LiftMaster opener to your car’s built-in remote, commonly known as HomeLink or car’s integrated garage door opener systems.
Step 1: Access the Learn Button on Your LiftMaster Opener
To begin, you’ll need to locate the “Learn” button on your LiftMaster garage door opener unit. This unit is typically mounted on the ceiling of your garage, directly connected to the door mechanism.
For safety, use a sturdy ladder to reach the opener. Once you have safe access, identify the programming panel. This panel is usually located on the back or side of the unit and is covered by a small, hinged door or a removable panel. Open this panel to reveal the internal controls.
Look for a button labeled “Learn.” The color and shape of this button can vary depending on the model of your LiftMaster opener. Common colors include red, orange, green, purple, or a yellow circular button on newer models.
Step 2: Prepare to Program – Press the Learn Button
Once you’ve located the “Learn” button, press and release it. This action activates the programming mode on your LiftMaster opener.
Immediately after pressing the “Learn” button, an LED indicator light next to the button will illuminate. This light signals that the opener is now in learning mode and is ready to be programmed. Typically, this light will stay on for approximately 30 seconds, giving you a window of time to complete the programming process.
It’s crucial to proceed to the next step promptly while the indicator light is still on. If the light turns off before you finish programming, you may need to press the “Learn” button again to re-enter programming mode.
Step 3: Initiate Programming with Your Car Remote (HomeLink)
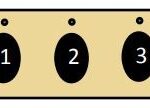
Now, move to your vehicle and locate your car’s integrated remote system, often HomeLink. HomeLink buttons are commonly found on the rearview mirror, visor, or overhead console of your car.
Choose the HomeLink button you wish to program to control your garage door. Press and hold this chosen HomeLink button. Keep holding the button throughout the next few steps until instructed to release it.
While continuously holding the HomeLink button, simultaneously press and hold the external remote control that you typically use to open your LiftMaster garage door. Position the handheld remote close to the HomeLink buttons in your car for optimal signal transmission.
Step 4: Complete the Synchronization Process
Continue holding both the HomeLink button in your car and the button on your handheld remote. Observe the indicator light on the HomeLink system. Initially, the HomeLink indicator light will likely blink slowly.
After a few moments, the HomeLink indicator light should begin to blink rapidly. This rapid blinking indicates that the HomeLink system is successfully learning the frequency code from your LiftMaster garage door opener remote.
Once the HomeLink indicator light transitions from a slow to a rapid blink, you can release both buttons – the HomeLink button in your car and the button on your handheld remote. In some cases, the HomeLink light might become solid and stop blinking when the programming is complete.
For some LiftMaster openers, particularly those with rolling code technology for enhanced security, you may need to press and release the “Learn” button on the garage door opener unit a second time after the HomeLink system has learned the initial code. Refer to your LiftMaster and HomeLink manuals for specific instructions if you encounter any difficulties.
Step 5: Test the Connection and Ensure Successful Programming
To verify that the programming process has been successful, press the programmed HomeLink button in your car.
If the programming was successful, your LiftMaster garage door should activate, opening or closing depending on its current state. There might be a slight delay of a few seconds between pressing the HomeLink button and the garage door responding. This is normal.
If your garage door does not respond, repeat steps 1 through 4, ensuring that you follow each step carefully. Double-check that you are within range of the garage door opener and that there are no obstructions blocking the signal. If issues persist, consult your LiftMaster and HomeLink owner’s manuals for troubleshooting tips or contact a professional garage door service technician for assistance.
By following these steps, you can easily program your LiftMaster garage door opener to your car remote, adding convenience and simplifying your daily routine.
