Having trouble syncing your car with your LiftMaster gate opener? It’s a common frustration, but thankfully, programming your LiftMaster gate to your vehicle is a straightforward process. This guide will walk you through each step, ensuring you can effortlessly open and close your gate with the touch of a button in your car. Let’s simplify your access and get your gate working seamlessly with your vehicle’s built-in system.
Step 1: Access Your LiftMaster Gate Opener’s Learn Button
The first step is to locate the programming hub of your LiftMaster gate opener. This unit is typically mounted in your garage or on a post near the gate itself. For safety and ease of access, use a ladder to reach the opener unit if it’s mounted overhead.
Once you have safe access, open the control panel on the gate opener. This panel is usually on the back or side of the unit and is designed to protect the programming buttons. Inside, you’ll be looking for the “Learn” button.
Image: Location of the learn button on a LiftMaster gate operator unit.
The Learn button is crucial for initiating the programming sequence. LiftMaster uses different colors to indicate the button type depending on the model’s age and technology. You might find a red, orange, green, or purple square button. Newer LiftMaster models often feature a circular yellow Learn button. Once you’ve identified the Learn button, proceed to the next step promptly as the programming window is typically time-sensitive.
Step 2: Activate the Learn Mode on Your LiftMaster Opener
Now that you’ve located the Learn button, it’s time to activate the programming mode on your LiftMaster gate opener. This step prepares the opener to receive the signal from your car’s remote system.
Press and hold the Learn button for a few seconds. You’ll know the button has been activated when a small LED light next to or near the button illuminates. This light usually stays on for around 30 seconds, indicating the programming window is open. The gate opener will be ready to be programmed when this light turns off. Be prepared to move quickly to the next steps once the LED light goes out, as the system is now actively listening for a new signal.
Step 3: Prepare Your LiftMaster Remote Control (If Necessary)
In some cases, particularly with older vehicles or HomeLink systems, you might need to program a standard LiftMaster remote control first. This remote then acts as an intermediary to teach your car’s HomeLink system or built-in remote system.
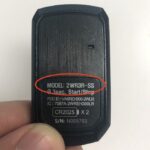
Most LiftMaster gate remotes are designed with a small pinhole button for programming. This recessed button prevents accidental presses and requires a pointed object to activate. Use a paperclip, the tip of a pen, or a similar small tool to gently press and hold this programming button on your LiftMaster remote. Consult your gate opener’s manual for specific instructions on programming your particular remote model if needed. If your car already has a rolling code system or HomeLink and is compatible with LiftMaster, you might be able to skip this step and program directly. Check your vehicle’s manual for compatibility information.
Step 4: Program Your Car’s HomeLink or Built-in System
With your LiftMaster opener in learn mode and your remote (if needed) prepared, you can now program your car’s HomeLink system or built-in gate opener controls. HomeLink is a common universal remote system found in many vehicles, featuring three buttons typically located on the rearview mirror or visor.
Choose one of the HomeLink buttons to dedicate to your LiftMaster gate. Press and hold your chosen HomeLink button until the indicator light above or near the buttons begins to blink slowly. While still holding the HomeLink button, now press the programmed LiftMaster remote (or, if directly programming, follow your car’s manual for sending a signal). Keep holding both buttons until the HomeLink indicator light blinks rapidly. This rapid blinking indicates that the HomeLink system is learning the frequency code. Once the connection is successfully established, the HomeLink light should stay on continuously without blinking, or blink at a normal rate, depending on your car’s system.
Image: Example of car HomeLink system buttons commonly used for gate and garage door programming.
If you are not using a HomeLink system but have a built-in car remote system, consult your vehicle’s owner’s manual for the specific programming steps. The general principle remains the same: activate the learn mode on your gate opener and then transmit a signal from your car’s remote system while it is in its learning mode.
Step 5: Test the Gate Connection
The final and most important step is to test if the programming has been successful. Wait a few moments after completing the programming steps to allow the systems to fully synchronize. Then, press the HomeLink button you programmed (or your car’s built-in gate control button).
Your LiftMaster gate should respond shortly after you press the button. If the programming was successful, the gate will open or close, depending on its current state. If the gate does not respond, repeat the programming steps carefully, ensuring each step is followed precisely. If you continue to experience issues, consult your LiftMaster gate opener manual or contact LiftMaster support for further assistance. Properly programming your gate to your car provides convenient and secure access to your property.
