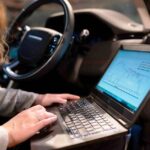
Programming your remote car starter can seem daunting, but it’s often a straightforward process you can do yourself. Whether you’re adding a new remote, replacing a lost one, or simply troubleshooting, understanding the programming procedure is key. This guide will walk you through the general steps for programming a remote car starter, drawing from common procedures and addressing potential issues you might encounter.
Step-by-Step Guide to Programming Your Remote Car Starter
The most common method for programming a remote car starter involves using an override button and the vehicle’s ignition. Keep in mind that specific steps can vary slightly depending on the manufacturer and model of your remote starter system. Always refer to your remote starter’s owner manual for the most accurate instructions. However, the following steps provide a general approach that works for many systems, particularly Ford factory remote starts:
-
Preparation is Key: Begin by ensuring your vehicle’s security system is disarmed and the ignition is turned off. For optimal access, open the driver’s side door and leave it open throughout the process.
-
Ignition Activation: Turn your vehicle’s ignition to the “on” position. This does not mean starting the engine, but rather turning the key to the point where the dashboard lights illuminate.
-
Locate and Press the Programming/Override Button: The programming or override button is typically located under the instrument panel, often near the steering column. Press and hold this button.
-
Enter Programming Mode: Continue holding the programming/override button. After approximately 15 seconds, you should hear the horn chirp three times. This audible signal indicates that the remote control programming mode has been successfully activated.
-
Release the Button: Once you hear the chirps, release the programming/override button. The system is now ready to learn the new remote.
-
Program Your Remote: Take the remote control you wish to program and press any button on it. Upon pressing a button, you should hear a single horn chirp or siren sound. This confirms that the system has successfully “learned” and recognized the new remote control.
-
Program Additional Remotes (If Necessary): If you have multiple remote controls to program, repeat step 6 for each additional remote. Most systems can store up to a certain number of remotes (e.g., eight in the original example).
-
Exit Programming Mode: To finalize the programming process, turn the vehicle ignition off. This action will exit the programming mode.
-
Test Your Remotes: After exiting programming mode, thoroughly test all programmed remote controls to ensure they are working correctly. Try starting your car remotely and using other functions of your remote to confirm proper operation.
Troubleshooting Common Issues
If you encounter difficulties programming your remote car starter, consider these troubleshooting steps:
-
Deleting Existing Remotes: If you’re having trouble programming a new remote or suspect issues with your system’s memory, you can try deleting all previously programmed remotes. Some systems allow deletion by entering programming mode and then, while in learn mode, pressing the vehicle’s door mounted “unlock” switch (if equipped with factory Remote Keyless Entry – RKE). After deleting, you will need to reprogram all desired remotes.
-
Check Remote Battery: A simple yet often overlooked issue is a dead or weak battery in your remote. Replace the battery in your remote with a fresh one and attempt the programming procedure again.
-
Remote Compatibility: Ensure that the remote you are trying to program is compatible with your specific remote start system. Swapping back covers or using remotes from different systems might lead to incompatibility. Verify the part number or consult your remote start system’s documentation to confirm compatibility.
By following these steps and troubleshooting tips, you should be able to successfully program your remote car starter and regain convenient remote start functionality. Remember to always consult your specific owner’s manuals for the most accurate and detailed instructions for your particular system.